Sign UP

Wednesday, September 28, 2016

You've got a friend in me...


C'mon! Admit it! I know you sang along with the title of this post. I get it - how could you not? Toy Story is a CLASSIC! It's still one of my all time favourites.

Today's card features Bella and her little turtle friend!

I cleaned up my workspace the other day and put all my ink pads away after planning my class for this coming weekend - WOW! I had made a MESS! It feels good to get back to a clean desk where I can get things DONE.

After I cleaned up my desk, I set about stamping the card for this week's sketch:


When I saw the sketch, I decided that Bella and her little turtle friend would be PERFECT! Plus, I've got a friend going through a difficult time right now and I wanted to create a special card for her. :)

So, here's what I came up with:


My base is Smoky Slate with a layer of Smoky Slate DSP from the Neutrals Paper Stack - these are GREAT value for money! You get 40 sheets - 2 each of 2 different designs (both of which are double sided!) in TEN colours and the cost is only $29 - that's less than 75 cents sheet! :)

At the top of the card, I stamped Bella and her little turtle friend in Basic Black Archival Ink and used my Aqua Painter to colour in the image. I stamped on Whisper White Cardstock - if you do this, be careful to not use too much water or your paper will start to bubble and pill. If you'd like to REALLY saturate your image, try using our Watercolour Paper instead.

I layered a piece of Soft Sky Cardstock under the image panel and adhered it to the front of the card.

Next, I wrapped a small bit of Whisper White Bakers Twine around my fingers and added that under sentiment using glue dots on the ends. The bakers twine then gets held in place with the Stampin' Dimensionals under the sentiment strip. Pretty neat, eh?


Last but not least, no card is complete without a little BLING! Which reminds me...I'm running low on Basic Rhinestones! Better add those to my next order before I forget. ;)
Don't forget to check out what the rest of the crew has been up to HERE.

What do you think?

STAMPS: Bella & Friends
INK: Basic Black Archival Ink for stamping; Smoky Slate, Wild Wasabi, Calypso Coral and Soft Sky for colouring
PAPERS: Whisper White, Smoky Slate and Soft Sky Cardstock; Smoky Slate DSP
ACCESSORIES: Aqua Painter, Bakers Twine, Basic Rhinestones, Glue Dots, Stampin' Dimensionals

Happy Stampin'!

Product List

Tuesday, September 27, 2016

Stitch it up!

If you liked last week's kit, here's a set with two-step stamping and a coordinating die set to take your stitching to the next level!

Festive Season Stamp Set & Festive Stitching Thinlits Dies by Stampin’ Up!

Happy Stampin' and Stitchin'!

Wednesday, September 21, 2016

Thanks!


RIGHT???

I've been trying to figure out what the heck to do with these colours for DAYS. I just couldn't wrap my brain around it (and I'm usually pretty good with colour!) and it was seriously stressing me out!

And then yesterday (talk about cutting it close!) it occurred to me (and I don't know why it didn't before) that I could STAMP OFF - D'OH!! And that's just what I did!


I started off with a Whisper White Base and then stamped the sun from Kinda Eclectic in Crushed Curry after stamping it off onto my Grid Paper first. I always have it on my workspace and I just keep the whole pad there, tearing off a sheet when the one I'm working on gets too full of ink. As an added bonus, you get crisper stamped impressions, because the pad of paper has just enough "give" to it.

Anyway...then I stamped the leaves from  Kinda Eclectic  - these were stamped at full strength and then stamped a second and third time without re-inking. I like that the lightest one almost looks like Mint Macaron! Then I fussy cut them and stacked them up.

The sentiment and banner are from Endless Thanks and after they were stamped, I cut them out too.

The finishing touch is the little butterfly also from Kinda Eclectic.  And then...after I took the picture, I decided to add Basic Rhinestones - LOL! Nothing like a little last minute embellishment!


What do you think?

STAMPS: Kinda Eclectic, Endless Thanks
INK: Crushed Curry, Emerald Envy, Tangerine Tango
PAPERS: Whisper White, Emerald Envy and Mint Macaron
ACCESSORIES: Glue Dot, Stampin' Dimensionals, Basic Rhinestones

Happy Stampin'!

Tuesday, September 20, 2016

Get a jump start!

Get 18 cards in this kit and "stitch up" you Christmas cards!


Get started today and get ahead of the holiday insanity!

Happy Stampin'!

Wednesday, September 14, 2016

Get Well Sooner!

Recently, on my way up to work, I delivered some Holiday Catalogues to my dear friend Jill (one for her and one for her mom). When I heard back from Jill (the next day, she's a busy girl!), she let me know that her mom had had some pretty extensive surgery on her foot and that she was in quite a bit of pain.

I asked her if there was anything I could do to help and she asked if I could send a card to her mom to buoy her spirits. Of course I said yes and I knew just the card I wanted to make - this week's Paper Crafts Crew Sketch:


As always, I took some liberties, but then, you expected that, didn't you? LOL!

Check it out:


I started off with a base of Rich Razzleberry (you know, because I *still* haven't cleaned up the mess from last week) and added a layer of Blooms & Bliss Designer Series Paper and then flipped the same paper over, cut out some strips and added them near the top and bottom. Then I cut a piece of Sweet Sugarplum and a stamped the sentiment on a piece of Whisper White:


Before adhering the the sentiment, I swirled some Whisper White Bakers Twine underneath it.

To the top left of the card, I added a little banner:


Oh! And some bling...'cause BLING!!!

Be sure to check out what the rest of the Crew have been up to HERE.

What do you think?

STAMPS: Greatest Greetings
INK: Sweet Sugarplum
PAPERS: Whisper White, Sweet Sugarplum and Rich Razzleberry Cardstock; Blooms & Bliss DSP
ACCESSORIES: Banner Punch, Bakers Twine, Basic Rhinestones, Stapler, Stampin' Dimensionals

Happy Stampin'!


Tuesday, September 13, 2016

On your mantle

Check out this wonderful idea from Carrie at Stampin' UP!

The Holiday Catalogue is now ready for orders! :)

Happy Stampin'!

Wednesday, September 7, 2016

Pretty in Pink!

At least I *think* it's pink? I'm never sure about the Sweet Sugarplum In Colour...depending on what you pair it with, it can lean towards either purple or pink. I'll let you decide. :)

First off, I'll show you the sketch we had to play with - I only went a little off script this week - LOL!


You can see below that I left off the Baker's Twine. I felt that there was enough going on that it wouldn't really add to the card. Now...if you want to play along, and you think the Baker's Twine will add to your card, don't feel that you can't add it just because I didn't. Go to town! Have fun with it!


I started off with a base of Sweet Sugarplum and paired with Rich Razzleberry. I don't know about you, but I think if Stampin' UP! still had a Colour Coach, these two colours would DEFINITELY be a Dynamic Duo! Adding in some Sahara Sand was just the right touch of neutral - it toned down the Whisper White and made the Rich Razzleberry and Sweet Sugarplum just POP!

The flower image is from the Penned & Painted Set. It features three-step stamping, which isn't nearly as intimidating as it sounds. If you'd like to order the set and would like some tips, I'm happy to help!

Here's a close up:


I sponged around the edges of the Whisper White circle and that added just the right touch of "vintage".

Here's the little banner:


I love the Stampin' UP! stapler! It adds tiny little staples (I'd say about ⅔ or regular size) and I think it's just the right accent just about anywhere!

Check out the inside:


I carried the Blooms & Bliss Designer Series Paper to the inside of the card and finished it off with a little doodling.

Be sure to check out what the rest of the Crew has been up to HERE.

What do you think?

STAMPS: Penned & Painted
INK: Sahara Sand, Sweet Sugarplum, Rich Razzleberry, Pear Pizzazz, Old Olive
PAPERS: Whisper White, Sahara Sand and Rich Razzleberry Cardstock; Blooms & Bliss DSP
ACCESSORIES: Big Shot, Dies, Punches, Glue Dots, Stampin' Dimensionals

Tuesday, September 6, 2016

Monday, September 5, 2016

Thank You

Welcome to another Monday! If you're in Canada, it's the day before school starts (though I think some province may start earlier) and the kids are dreading the return. The stay-at-home-moms (like myself) are probably dancing in the streets...naked. OK, not really...but you get the idea! I for one am pretty darn excited to get my quiet back - WOOHOO!!!

Today, I created a cute little thank you note for the sketch challenge over at Freshly Made!


It's 4 ¼" square, so it will still fit inside a standard envelope. I started of with a base of 4 ¼" x 8 ½" Rich Razzleberry which I folded in half. To that I added a layer of Sahara Sand and then some Whisper White and Blooms & Bliss Designer Series Paper.

The sentiment from Thoughtful Branches, which is *still* available, is stamped in Rich Razzleberry. The little flowers from Petite Petals were stamped in Sahara Sand, Sweet Sugarplum (stamped off) and Rich Razzleberry. The bottom two were adhered to the card front using Glue Dots and the top one was adhered using Stampin' Dimensionals.

What do you think?

STAMPS: Petite Petals, Thoughtful Branches
INK: Sahara Sand, Sweet Sugarplum, Rich Razzleberry
PAPERS: Whisper White, Sahara Sand and Rich Razzleberry Cardstock; Blooms & Bliss DSP
ACCESSORIES: Punch, Glue Dots, Stampin' Dimensionals

Happy Stampin'!

Saturday, September 3, 2016

Yule *heart* this!

Do you need tags/gift enclosures for some special people? I've got just the ticket! Check it out:


I made up eight of these in under an hour, but if you needed just one, you could probably whip one up in about 5 minutes. The longest amount of time was running the stamped images through the Big Shot and sponging the edges.

The card base is Real Red Cardstock. It's available in 12 x 12 in the Holiday Catalogue, which is perfect for making eight of these little note cards.

I stamped on the inside too:


Since it looks like a little sugar cookie, you could definitely attach this note to a package of cookies.

Quick & Cute!

What do you think?

STAMPS: Jar of Cheer, Candy Cane Christmas
INK: Real Red, Crumb Cake
PAPERS: Whisper White and Real Red Cardstock
ACCESSORIES: Candy Cane Lane Washi Tape, Sponges, Stampin' Dimensionals

Happy Stampin'!

Friday, September 2, 2016

What a sweet season!

You may remember this mess from my Facebook Page a couple weeks ago:


Well, I FINALLY got my hands on the final piece of the puzzle for this TOTALLY adorable card and here it is:


So I stamped the little Gingerbread man and........


GAH!!! Can you stand it? Can you stand the amount of CUTE? I mean seriously! I want to make 1000 of these - that's how cute they are! :)

I started off with a base of Crumb Cake and added layers and stamping from there. I'm not going to give you *all* of the details, because I'll be featuring this card in an upcoming class.

Here's a close up of the little Gingerbread Man:


He's a little blurry, but you get the idea and the level of cute. :)

And here's the inside:


Not Christmas paper, but since most of it is covered up, we'll pretend. :)

What do you think?

STAMPS: Cookie Cutter Christmas, Candy Cane Christmas
INK: Early Espresso, Real Red
PAPERS: Crumb Cake, Early Espresso and Whisper White Cardstock; Candy Cane Lane DSP and Neutral Designer Series Paper Stack
ACCESSORIES: Envelope Punch Board, Cookie Cutter Punch, Real Red Baker's Twine, Stampin' Dimensionals

Happy Stampin'!

Thursday, September 1, 2016

Have some tea 3-D Thursday

You may remember last week's post where I mentioned that I had misheard some directions for what I was creating and now it had to be for this week...well, it's this week! :)

Sam Hammond (AKA Pootles) over in the UK makes the most adorable little boxes for all KINDS of things and last week, she created the cutest little tea box for tea that comes in bags. As soon as I saw it, I just knew I had to recreate it. And then...I was sorting out some things for our trip to France (we're in Lyon till tomorrow) and came across a tea bag that I hadn't used from our last trip and it was the perfect fit!

Check it out:


I started off with a piece of Mint Macaron Cardstock that was 3 ¼" x 11" and scored it at 3 ½", 4 ¾", 8 ¼" and 9 ½". You can find all the directions on Sam's YouTube channel. I then went nuts with all the sponging ('cause sponging!) and added pieces of Blooms & Bliss Designer Series Paper, which were also sponged.


Then I created the little inserts (the correct size this time!) and sponged all over those too.


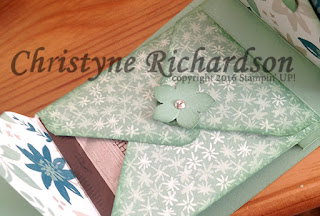
The flower closures are just BRILLIANT and I think I'll use Sam's idea in the future.


Basically, you put glue dots on only the two bottom petals of the flower, hold the flap down and adhere the flower in the correct spot. The flap then simply tucks under the top petal. See? Brilliant!

And here's the tea I found:


At time of writing, I was waiting for little magnets to arrive on a slow boat from China, so the top doesn't close securely yet. I'm hoping they'll be at home when we return tomorrow so I can finish it up.

What do you think?

STAMPS: None
INK: Mint Macaron (for sponging)
PAPERS: Mint Macaron Cardstock; Blooms & Bliss DSP
ACCESSORIES: Punch, Basic Rhinestones, Glue Dots, Sponges

Happy Stampin'!