Sign UP

Sunday, May 31, 2009

The Never Ending Simply Scrapping Kit - Part III

Last year around Christmas, I saw this GREAT tutorial for covering 1/2 of a mini legal note pad. Of course, I wanted to try it...and of course, life got in the way - LOL! So...I never got around to it!

The other day, I was in Staples and spied the mini legal note pads and asked the ladies at the copy center if they would be so kind as to cut them in half for me - which they did!

I came home and was unable to find the tutorial on SplitCoast Stampers. Fortunately, the stamping community is a wonderful one and within a day of posting a request for the tutorial, I had several replies. If you'd like the tutorial, you can find it here. And there's a whole HOST of ideas in this gallery here.

So, here's my version using, once again, the Never Ending Simply Scrapping Kit!

I sent it off to CMH sister and while it wasn't in her choice of colours for this round or her absolute favourite colours, I sure do hope she likes it!

Thanks for stopping by today! Happy Stampin'!

Copic Marker Matches for Stampin' UP! Markers

I found this on Paper Canoes, here, but decided having a ready reference on my blog would be a good thing...because then I wouldn't have to keep looking for it thereby saving myself some time and giving me more time to stamp - WOOHOO!!!


Current Colors
Almost Amethyst - B63 Light Hydrangea
Always Artichoke - G99 Olive
Apricot Appeal - YR21 Cream
Ballet Blue - B23 Phtalo Blue
Barely Banana - Y11 Pale Yellow
Bashful Blue - B32 Pale Blue
Blush Blossom - E00 Skin White
Bordering Blue - B91 Pale Grayish Blue (Add N2 over it for a perfect match)
Bravo Burgundy - E09 Burnt Sienna over R59 Cardinal
Brilliant Blue - B18 Lapis Lazuli
Brocade Blue - B34 Manganese Blue
Cameo Coral - R22 Light Prawn
Certainly Celery - *** I found that G12 was not quite right, currently looking for the perfect match.
Chocolate Chip - E49 Dark Bark
Close to Cocoa - E74 Cocoa Brown
Creamy Caramel - E33 Sand
Elegant Eggplant - V09 Violet
Gable Green - YG06 Yellowish Green
Garden Green - YG67 Moss
Glorious Green - G17 Forest Green
Green Galore - G14 Apple Green
Handsome Hunter - G29 Pine Tree Green
Lavender Lace - BV02 Prune
Lovely Lilac - BV17 Deep Reddish Blue
Mellow Moss - BG93 Green Gray
More Mustard - YR23 Yellow Ochre
Night of Navy - B39 Prussian Blue
Not Quite Navy - B97 Night Blue
Old Olive - YG95 Pale Olive
Only Orange - YR68 Orange
Orchid Opulence - V15 Mallow
Pale Plum - V95 Light Grape
Perfect Plum - BV13 Hydrangea Blue over BV25 Grayish Violet
Pink Passion - RV25 Dog Rose Flower
Pixie Pink - RV13 Tender Pink
Pretty in Pink - R32 Peach
Pumpkin Pie - YR16 Apricot
Real Red - R29 Lipstick Red
Really Rust - E08 Brown
Regal Rose - R85 Rose Red
Rose Red - R37 Carmine
Ruby Red - E07 Light Mohogany
Sage Shadow - BG93 Green Grey over G21 Lime Green
So Saffron - Y21 Buttercup Yellow
Summer Sun - Y17 Golden Yellow
Taken with Teal - BG49 Duck Blue
Tempting Turquoise - BG05 Holiday Blue
Yo Yo Yellow - Y15 Cadmium Yellow

2007 In Colors
Buckaroo Blue - B95 Light Grayish Cobalt
Cool Caribbean - BG45 Nile Blue
Cranberry Crisp - N2 over R37 Carmine
Marigold Morning - Y38 Honey
True Thyme - YG97 Spanish Olive
Vintage Violet - BV29 Slate


2008 In Colors
Blue Bayou - BG75 Abyss Green
Soft Sky - BG10 Cool Shadow
Wild Wasabi - YG63 Pea Green
River Rock - YG91 Putty
Groovy Guava - R02 Flesh
Purely Pomegranate - R39 Garnet

2009 In Colors
Baja Breeze - BG72 Ice Green
Kiwi Kiss - YG03 Yellow Green (a little bright alone, add YG95 over it for closer match)
Pacific Point - B06 Peacock Blue
Pink Pirouette - RV00 Pinkish White
Riding Hood Red - R29 Lipstick Red
Tangerine Tango - YR07 Cadmium Orange

Neutrals
Basic Black - 110 Special Black
Basic Gray - C7 Cool Gray No. 7
Going Gray - N2 Neutral Gray No. 2
Kraft - E43 Dull Ivory
Sahara Sand - W3 Warm Grey No. 3
Very Vanilla - E30 Bisque

Since the 2008/2009 in Colours will be retiring at the end of June, I'm hoping to be able to find the matches for the new 2009/2010 in Colours too.

Have a great day!

Saturday, May 30, 2009

The Never Ending Simply Scrapping Kit - Part II

So I pulled out some more of the pieces of the Simply Scrappin' Kit and came up with this:
Aren't they just the most adorable things? They're mini composition books and are less than 1/4 the size of a regular composition book. I just love them!!! The pens are RSVP pens and are available at Staples. These are great because you can unscrew the top of the pen to insert paper and create a custom made pen. How cool is that?

The ribbon I used on the middle book is not from the Simply Scrappin' Kit, it's from my stash. When I trimmed the Riding Hood Red textured cardstock, I trimmed it a little crooked, so I covered it up with ribbon. Necessity is the mother of invention, right?

If you love this Simply Scrappin' Kit as much as I do, I can pretty much guarantee that it will be retiring at the end of June as the colours that are part of the kit are from the 2008/2009 In Colours from Stampin' UP! Since the In Colours will be retiring at the end of June to make way for 2009/2010 In Colours, it stands to reason that this kit will be retiring too. If you'd like to order one and are in Canada, do let me know! I'd be happy to do that for you!

Hope you are having a great day and that you get some stamping time in!!!

Friday, May 29, 2009

True Confessions

*ahemcoughcoughahem* clears throat and raises right hand:

"My name is Christyne Richardson and I am a Becky Roberts addict."

There, I said it. PHEW! What a weight off my chest!

Have you seen Becky's Blog? Simply put, it rocks! Becky started blogging back in 2007 and I have been perusing her blog...entry by entry...and she never ceases to inspire me. She has the cutest ideas - many of which are free on her blog - and tutorials - most of which are priced at $3.95 and offer upwards of 20 pages of step by step instructions and TONS of photos! I own all but one...and am NOT so patiently waiting for her latest one to be posted.

Today, she inspired me (all the way back from 2007) to do some work on a Rolodex that I've owned since about 2005 - YIKES! I figure it must be that old because one of the cards that my friend made has pictures on it from CKU Utah and we attended that in 2004. See...OLD!

Anyway, Becky has the CUTEST little Rolodex which you can see here. It's absolutely adorable and you are just gonna love it! My Rolodex is quite a bit bigger and this is what I was working on today:


We've been looking at buying a house. We own our condo (box in the sky), but with five people living in 892 sq. ft., let's just say...it's a little crowded. We've a while to go yet, because the development we're looking at won't be ready till December 2010 and maybe even later if we wait for the second release of homes (which is where our ideal choice is located).

So...when you have a house, you inevitably need tradespeople - plumber, painter, electrician...that sort of thing. Not one to do things at the last minute and always at LEAST 3 steps ahead of everyone else (just ask DH - I was busy counting kids in my head about 3 seconds after he proposed!), I made the above Rolodex card to be the divider for my tradespeople section.

This is NOT a Stampin' UP! stamp, but since I'm a hobby demo and not a "make a living out of this" demo (though I certainly wouldn't object if any Canadian readers wanted to place an order or host a workshop), I figure it's OK to post images from other companies.

No, this is not a Stampin' UP! stamp. This little gem is from a WONDERFUL Canadian company called High Hopes Stamps. I've been ordering from them for a few months and they are wonderful to deal with. Shipping times are sometimes slow, but that's because their releases are so darn cute making them EXTREMELY popular. One of the good things is that you can order the stamps unmounted - no wood = 1/2 the price of a wood mounted version = twice as many stamps. WOOHOO!!!

I stamped our little friend using Memento Tuxedo Black ink and coloured him in using my Copic markers. Unfortunately, I had to cut off some of his feet in order to make him fit in the Rolodex. He's still a little big, but I suppose I could just leave the Rolodex open to my little carpenter ant because he's just that cute!

I'll be back this week with more projects I plan on CASE'ing from Becky!

Happy Stampin'!

Tuesday, May 26, 2009

Have you seen this???


One of the blogs I follow had it posted. You're gonna LOVE it!

For the Bride to Be

Continuing my love affair with Parisian Breeze Specialty DSP, I created this set which I think would be just perfect for a Bride to Be:

This set comes ready to give in a coordinated gift bag and includes 6 cards (3 each of the designs shown here) and a mini composition book for making notes related to the wedding.

I used the stamp set "For the Bride" and the bell image is from the Level III Hostess Set "Goody Goody Gumdrops". I used my Stamp-a-majig to position the images and sentiments EXACTLY where I wanted them.

What do you think?

Stamps: For the Bride, Goody Goody Gumdrops
Ink: Chocolate Chip, Baja Breeze
Paper: Parisian Breeze Specialty DSP
Cardstock: Whisper White, Baja Breeze, Chocolate Chip
Accessories: Ribbon, Ticket Corner Punch, Silver Brads

Happy Stampin'!

Monday, May 25, 2009

Another Triple Play!

WOOHOO!!! I pulled off another triple play! This one was done for this Mojo Monday Sketch (Better late than never right?):
The WTC challenge to alter a tin and the Colour Challenge which was Kiwi Kiss, Summer Sun and Only Orange (again, better late than never...since they were challenges from TWO weeks ago - LOL!)

I'm going to send this to a secret sister...hope she likes it!

Stamps: Trendy Trees
Cardstock: Summer Sun, Only Orange, Kiwi Kiss (not all SU!, but close matches)
Ink: Kiwi Kiss, Chocolate Chip
Accessories: Ribbon, Altoids Tin

Happy Stampin'!

Sunday, May 24, 2009

Parisian Breeze and Becky's TOTE-ALLY Awesome Tote

Oh...Parisian Breeze DSP how I love thee...

I love it SO much, that despite ordering a pack for April club, I had to order ANOTHER pack of it while Stampin' UP! has its paper special going on (buy 3 packs of DSP/textured cardstock and get the 4th free!). I'm going to be SO sad when it retires at the end of June - SO sad!

While I can use it (gaining Demo status means using current goodies only to showcase SU!), I'm going to use it to the max!

Here's what I created with help from yet another AMAZING Becky Roberts tutorial which you can find on her site Inking Idaho (just scroll down the right hand side):


Becky's tutorials are just great! They are VERY detailed with LOTS of pictures and worth EVERY penny, IMO. If you don't own any yet, you should rush right over to her site and pick up a couple. You won't be disappointed!

I used the Blooming with Love stamp set, Baja Breeze ink and cardstock, Chocolate Chip cardstock and of course my beloved Parisian Breeze specialty DSP. I did the closure a little different than Becky did and used a stack of Prima flowers that matched the paper/DSP perfectly! Don't you just LOVE it when that happens?

What do you think?

Stamps: Blooming with Happiness
Ink: Baja Breeze
Paper: Parisian Breeze Specialty DSP (get some NOW!!!)
Cardstock: Whisper White, Baja Breeze, Chocolate Chip
Accessories: Punches, Ribbon, Prima Flowers

Happy Stampin'!

Friday, May 22, 2009

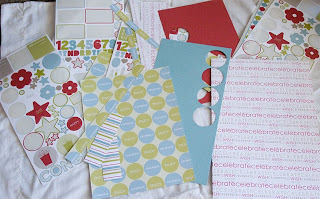
The Never Ending Simply Scrapping Kit

Since May is National Scrapbooking Month (who would have thought that a few years ago when National Scrapbooking DAY was the first Saturday in May that it would turn into a month long celebration?), Stampin' Up has an AMAZING deal for scrapbookers out there! You can become a Stampin' Up! demonstrator for a mere $99 CAD. You get the scrapbooking add on that is normally $60 when you join Stampin' Up! + all the business supplies to get your business up and running.

My upline (yes, she FINALLY did it) knew darn well that I couldn't resist the offer and after many, MANY years of her just being my supplier (pusher - LOL!), I have finally joined her team...and she couldn't be more thrilled!

So, I decided to challenge myself and see just how much you could do with a Simply Scrappin' Kit - in this case, Best Ever which is available for $23.95.

I started off using a tutorial/instruction sheet from Andrea Walford, which you can find here. It's a tutorial to complete what she has called an Emergency Card Kit.


With Andrea's instructions, you can make not one, but TWO Emergency Birthday Card kits. Keep one for yourself and give the other to a friend! Pictured here is just one of the card kits; the other is identical.

Next I made a 20 (yes, 20) page 6 X 6 album. Lots of pictures here, so be patient.


I'm not sure if I'm going to give it away or keep it for myself. It is after all my 40th birthday this year...

At this point, I still had some DSP, but was pretty much out of textured cardstock except for some scraps.

As part of the starter kit, I also ordered 12 X 12 Textured Cardstock in the 2008/2009 In Colours. So, I broke into that package and made a simple double page 12 X 12 layout.


Next, I dipped into my stash of Baja Breeze 8 1/2 X 11 cardstock to make some cards, using the abundant amount of stickers that you get in a Simply Scrappin' Kit. With four sheets of cardstock, I made eight cards.


And this is what was left over:

Now I need to find something to do with it all - LOL! I'll post more when I've used more of it up!

Happy Stampin'!

Tuesday, May 12, 2009

My first ever tutorial!!!

I was browsing the SplitCoast gallery last week (as I OFTEN do!) and found a GREAT card. You can see it here: Mother's Day Touch of Nature.

I'm a very hands on/visual learner, so I had a little bit of trouble with the written directions. I thought others might too, so here is the tutorial that I wrote after some trial and error.

I altered the dimensions of the card just a little so that it would fit in a standard A2 envie.

I started off with a piece of cardstock that measured 5 1/2 X 12.

On both long sides, I cut the paper from the 2" mark to the 10" mark, 1 1/4 " down from the top and up from the bottom.

I then took out my Scor-Pal (which is DEFINITELY one of those tools you never knew you needed till you had one!) and scored at the 2" and 10" mark from the top to the cut line and from the cut line to the bottom. I scored at the 4" and 8" mark from the top to the bottom of the sheet.

Here is the card with the first few folds complete.

And here it is with all the folds completed.

Another view of the unembellished card standing up.

Here is the card partially embellished. The full side panels of DSP are 5 1/4 X 1 3/4, the smallest panels at the top and bottom are 1" X 1 3/4" and the larger ones are 1" X 3 3/4". The small, middle panels of DSP are 1 3/4" X 2 3/4".

To embellish, I used stamps from the Goody Goody Gumdrops Hostess set as well as from the Yummy set that was available during SAB. I used my Stamp-a-ma-jig, which is another one of those tools you never knew you needed till you got one.

Start by positioning the plastic sheet that comes with your stamp positioner in the right angle of the positioner. Stamp your image onto the plastic sheet.

Use your stamped plastic sheet to determine exactly where you want your stamped image on your paper. This is especially helpful if you're using small pieces of paper.

Once you've determined the positioning of your image, line up the stamp positioner with the corner of the plastic sheet. Hold the stamp positioner firmly and remove the plastic sheet.

Stamp your image into the right angle of the stamp positioner.

Remove the stamp and admire your work!!!

I used the same technique to stamp the cherry heart on top of the ice cream sundae as seen here:
Here is the finished card:

What do you think???

Stamps: Goody Goody Gumdrops, Yummy
Cardstock: Bazzill Basics (almost like SU! Bashful Blue)
Ink: Brocade Blue, Basic Gray
DSP: SAB set
Accessories: Prima Flowers, Making Memories Brads

Happy Stampin'!

Monday, May 11, 2009

A Triple Play!

I've always wanted to pull off a triple play card and today I did it! Three challenges in one card - WOOHOO!!!

This card covers the Ways to Use It Challenge, the Limited Supplies Challenge and the Mojo Monday Sketch all from last week - GO ME!

For the Ways to Use It challenge we were to use Kraft paper, for the Limited Supplies challenge we were to choose a little known May holiday (I am sending this Thank You card to our favourite cardiac clinic nurse, Marilyn since May 12th, is International Nurses Day) and the Mojo Monday Sketch is this one:
I started off with a Kraft card base and built up from there. The next layer up is a 4 X 5 1/4" piece of DSP from the AMAZING Parisian Breeze collection. If you don't own it yet, you should order it...and you can get it from me! The other layers are also from the Parisian Breeze DSP collection and were left over from another project (that I really need to take pictures of).

I used my threading water punch to scallop the edge of the blue paper.

The image panels are 2 X 3" and 2 X 2" matted in Kraft cardstock. I stamped the images which are from Doodle This and Doodle That in Chocolate Chip on Whisper White. The ribbon is Chocolate organza.

The inside is finished with more of the Parisian Breeze DSP and stamped with "Thanks So Much" from the Sincere Salutations set in Chocolate Chip.

What do you think?

Cardstock: Kraft and Whisper White
DSP: Parisian Breeze Collection
Ink: Chocolate Chip
Accessories: Ribbon, Scrap Mats for paper piercing.

Happy Stampin'!

In Case you were wondering...

SU colours matched to Copic markers - WOOHOO!!!

Courtesy of Paper Canoes

Current Colors
Almost Amethyst - B63 Light Hydrangea
Always Artichoke - G99 Olive
Apricot Appeal - YR21 Cream
Ballet Blue - B23 Phtalo Blue
Barely Banana - Y11 Pale Yellow
Bashful Blue - B32 Pale Blue
Blush Blossom - E00 Skin White
Bordering Blue - B91 Pale Grayish Blue (Add N2 over it for a perfect match)
Bravo Burgundy - E09 Burnt Sienna over R59 Cardinal
Brilliant Blue - B18 Lapis Lazuli
Brocade Blue - B34 Manganese Blue
Cameo Coral - R22 Light Prawn
Certainly Celery - *** I found that G12 was not quite right, currently looking for the perfect match.
Chocolate Chip - E49 Dark Bark
Close to Cocoa - E74 Cocoa Brown
Creamy Caramel - E33 Sand
Elegant Eggplant - V09 Violet
Gable Green - YG06 Yellowish Green
Garden Green - YG67 Moss
Glorious Green - G17 Forest Green
Green Galore - G14 Apple Green
Handsome Hunter - G29 Pine Tree Green
Lavender Lace - BV02 Prune
Lovely Lilac - BV17 Deep Reddish Blue
Mellow Moss - BG93 Green Gray
More Mustard - YR23 Yellow Ochre
Night of Navy - B39 Prussian Blue
Not Quite Navy - B97 Night Blue
Old Olive - YG95 Pale Olive
Only Orange - YR68 Orange
Orchid Opulence - V15 Mallow
Pale Plum - V95 Light Grape
Perfect Plum - BV13 Hydrangea Blue over BV25 Grayish Violet
Pink Passion - RV25 Dog Rose Flower
Pixie Pink - RV13 Tender Pink
Pretty in Pink - R32 Peach
Pumpkin Pie - YR16 Apricot
Real Red - R29 Lipstick Red
Really Rust - E08 Brown
Regal Rose - R85 Rose Red
Rose Red - R37 Carmine
Ruby Red - E07 Light Mohogany
Sage Shadow - BG93 Green Grey over G21 Lime Green
So Saffron - Y21 Buttercup Yellow
Summer Sun - Y17 Golden Yellow
Taken with Teal - BG49 Duck Blue
Tempting Turquoise - BG05 Holiday Blue
Yo Yo Yellow - Y15 Cadmium Yellow

2007 In Colors
Buckaroo Blue - B95 Light Grayish Cobalt
Cool Caribbean - BG45 Nile Blue
Cranberry Crisp - N2 over R37 Carmine
Marigold Morning - Y38 Honey
True Thyme - YG97 Spanish Olive
Vintage Violet - BV29 Slate


2008 In Colors
Blue Bayou - BG75 Abyss Green
Soft Sky - BG10 Cool Shadow
Wild Wasabi - YG63 Pea Green
River Rock - YG91 Putty
Groovy Guava - R02 Flesh
Purely Pomegranate - R39 Garnet

2009 In Colors
Baja Breeze - BG72 Ice Green
Kiwi Kiss - YG03 Yellow Green (a little bright alone, add YG95 over it for closer match)
Pacific Point - B06 Peacock Blue
Pink Pirouette - RV00 Pinkish White
Riding Hood Red - R29 Lipstick Red
Tangerine Tango - YR07 Cadmium Orange

Neutrals
Basic Black - 110 Special Black
Basic Gray - C7 Cool Gray No. 7
Going Gray - N2 Neutral Gray No. 2
Kraft - E43 Dull Ivory
Sahara Sand - W3 Warm Grey No. 3
Very Vanilla - E30 Bisque

Friday, May 8, 2009

Well, she finally did it...

My Stampin' Up demonstrator, the lovely and talented Caroline Lebel, has finally done it! She's waited patiently for 6 long years, but she has finally managed to add me to her team.

I'm just starting out, but if you're looking for a Stampin' Up Demonstrator in the West End (Mississauga), feel free to contact me!!!

Happy Stampin'!

Wednesday, May 6, 2009

Congratulations!

Last week, Colin and Jonathan's godsister (that would be the daughter to their godmother) was accepted to Teacher's College.

She had originally been declined for lack of space, but I guess someone else must have declined their acceptance and Melissa got the call.

We are, of course, absolutely thrilled for her as she is a most wonderful young lady and deserves nothing but good things!

Here's the card I made for her:


It was also the technique challenge over on SplitCoast Stampers last Monday. I haven't done many challenges over there lately, but this one just seemed perfect!

I used one of the Sell-A-Bration set from SU! called "Congratulations".

The rolled marble background was done using some marbles borrowed from my son and Close to Cocoa, Chocolate Chip and Mellow Moss re-inkers.

I stamped the sentiment in Chocolate Chip on Whisper White.

What do you think?

STAMPS: Congratulations Set from Sell-A-Bration
Cardstock: Whisper White, Chocolate Chip
DSP: Hand made by ME!!!
Ink/Re-Inkers: Chocolate Chip, Close to Cocoa, Mellow Moss

Happy Stampin'!

Sugar Nellies...

...are quickly becoming one of my favourite image companies!

I don't own any, but have snagged LOTS of the Canadian snag list over on SplitCoast Stampers.

Here is one of my recent favourites:


Unfortunately, the image isn't the greatest as I had a little camera shake going on, but you get the idea. Isn't Daisy adorable? I just love her!

Happy Stampin'!
Time to get some Creativity going!

Well, actually...it's been going, I just haven't had the opportunity to sit down and edit pics in order to load them up!

Here are some cards that I created in the past few weeks:

From High Hopes Stamps:


If you haven't checked out High Hopes Stamps, you REALLY should! They have the most adorable images and they are CANADIAN!!!


From Stamping Bella:


Stamping Bella is another Canadian Company!

Happy Stampin'!