Sign UP

Friday, April 29, 2011

National Scrapbook Month starts Two DAYS EARLY!

Good news, good news!!!  National Scrapbook Month starts two days early - LUCKY US!!


Check out all the details here.  This promotion lasts for the whole month of May!

But wait, there's MORE! You can join Stampin' UP! RIGHT NOW with the Digital + Starter Kit for just $150.50! You can even add on the Stampin' Memories kit for just $42.  These two kits together are worth almost $500 and you can get them both for under $200. PLUS, there's NO shipping OR tax on the starter kit and it ships RIGHT to your door!

Get all the details for that here.  And, don't forget, the very next person to join my team will get a free Colour Coach and the free Level 3 Hostess set "Simply Sent, Cute as a Button", which contains EVERYTHING to complete eight cards, including the ink and stamps.

Happy Scrappin'!!!

Thursday, April 28, 2011

Did You Know?

Stampin' Up! is proud to offer beautiful, affordable, high-quality stamps and accessories for a good value. You won't find better products for scrapbooking or handmade cards anywhere else!

We focus on making sure our product is of the highest quality. In addition to the deeply etched images on our rubber stamp sets (which result in sharp, clear images on your projects) and our exclusive products, we also have a stringent quality control process to ensure you get the best products possible. 

For example, we make sure our colours are true so you get beautiful coordination whether you're using Real Red ink, paper, ribbon, buttons, or anything else in our exclusive colors. If a batch of products isn't quality, we won't send them on to customers. 

Wednesday, April 27, 2011

Watercolour Wednesday - For Teacher

Welcome back!  I hope you enjoyed last week's post with a Halloween card for your child's classroom teacher. This week, I'm bringing you the perfect card for the first day of school (or last, depending on your preference).

Have a look:


You'll notice that the layout is the same.  I wanted to keep it consistent throughout the collection.  I think it makes it look more cohesive.

For this one, I chose Baja Breeze and Riding Hood Red to go along with the Sahara Sand card base. You've gotta love Sahara Sand for it's versatility.  You can pair it with pretty much anything!!


Here's a close up of the sentiment detail again.  As you already know from following my blog, one of my all time favourite accessories is STAMPIN' DIMENSIONALS! I don't think I can make a card without them anymore - LOL! I just love how they seem to add SO much dimension for such little effort.

If you don't have any Stampin' Dimensionals, you can order them now. Just click on the words above and the link will take you directly to my store and right to that product! Easy Peasy!  Then, you too can wonder how you ever lived without them!

I hope you enjoyed week #2 and that you'll be back again next week to see what else I've done.

STAMPS: Greeting Card Kids
INK: Staz-ON
PAPERS: Sahara Sand, Baja Breeze and Riding Hood Red Cardstock; Riding Hood Red DSP from Regals Paper Pack; Watercolour Paper
ACCESSORIES: Watercolour Crayons, Aqua Painters, Stampin' Dimensionals, Punches

Happy Stampin'!

Tuesday, April 26, 2011

On the Grow - Part Two

This is my second post for today, so scroll down to see what else I've been doing.

I couldn't very well show you one image from this fun stamp set and not share the other, so you get TWO cards today - lucky you!

I found an older Viva la Verve sketch that I used for this card. I completely fell in love with all those layers! Here are some of the details:


Don't you just LOVE those brads? On a recent order, I added all the brads that are available in the colour collections and I'm so glad I did! The ones I used for this card are Pumpkin Pie from the Brights Collection. One of my FAVOURITE things about Stampin' UP! is that everything matches!  So, you don't need to worry that your "orange" brads won't be the same shade as your "orange" paper.  Simply select the same "orange" and you're good to go! Inks and markers match too!

I finished the inside of this card with some matching paper and the Scallop Trim Border Punch.

Here's a close up of the coloured image:


I used Wild Wasabi and Garden Green to colour the leaves. For the flowers, I used Tangerine Tango, Cajun Craze and a touch of Cherry Cobbler for the flower middles. On the vase/jar, I used a touch of Bashful Blue and really washed it out, so it looked close to clear. The background was done using Peach Parfait, again, really washed out.

But Christyne, you're thinking...there's no Peach Parfait Watercolour Crayon, how did you do that?

Watercolouring using ink from an ink pad:

  • While your ink pad is still closed, squeeze it a little bit.
  • When you open your ink pad, you'll notice a small deposit of colour in the lid.
  • Dip your Aqua Painter into ink on your lid and use this to colour your image.
  • Couldn't be easier!
Here's my completed card:


I think this will be the card I send to my MIL for Mother's Day. Now I just need to come up with one for MY mom!

What do you think?

STAMPS: On the Grow - Available May 1st!
INKS: Staz-On, Peach Parfait
PAPERS: Whisper White, Rose Red and Tangerine Tango Cardstock; Sweet and Sour Specialty DSP (each it is clear embossed on one side!); Watercolour Paper.
ACCESSORIES: Watercolour Crayons, Aqua Painters, Brads, Scallop Trim Border Punch, Stampin' Dimensionals

Happy Stampin'!

ATC Tuesday - On the Grow

I got On the Grow last week as part of my summer mini pre-order and couldn't wait to ink it up!  Of course, it just BEGS to be watercoloured, but then I would have had to wait till Watercolour Wednesday to showcase it. Since I just started a series last week, that would mean I'd have to wait till the middle of MAY to put this card up.  NO WAY!

So I decided to cheat a little and use if for ATC Tuesday this week.  You don't mind, right?

Here's the ATC portion of the card. I used a piece of our Watercolour Paper and trimmed it to 2 1/2 x 3 1/2". After I had it coloured, I decided that I wanted to add a border, so I trimmed it further to 2 1/4 x 3 1/4" so I could add a Melon Mambo mat making it ATC size (2 1/2 x 3 1/2"). 


This sentiment is SO. MUCH. FUN. And don't you just love the long banner? I got this FAB idea from Diana Gibbs for making a really long jewelry tag. Here's how you do it:

  • Cut your strip of paper to 3/8" wide. At this point, it doesn't matter how long it is.
  • Rather than just inserting it into the punch, flip the punch over and put one end into the punch going through the punch shape.
  • It will look like one end of the paper is through the punch and then you'll have a long tail sticking out.
  • Essentially what you're doing is just punching one end of paper. This creates your really LONG jewelry tag.
  • Stamp your sentiment up close to the "tag" end (where the little circle is) and then use your square punch (size really doesn't matter - LOL!) to punch out the "banner" end.
  • Embellish the tag as desired.  I took my 1/16" handheld punch and punched a hole in the little circle.  Then I tied a piece of Whisper White Baker's Twine through the hole.
  • Adhere to your card using glue dots.  If you bend it up just a bit, it looks even MORE like a little banner.
Here's the finished card:


I used Pink Pirouette for my base and Pink Pirouette again for my first layer stamped with Versamark using the Flower Fest Set from the Summer Mini. I added a partial layer of Melon Mambo also stamped with the same flower and Versamark Ink.

My focal image is adhered to the front of the card using Stampin' Dimensionals.

What do you think?

STAMPS: On the Grow, Flower Fest
INK: Staz-On, Versamark
PAPERS: Whisper White, Pink Pirouette and Melon Mambo Cardstock; Watercolour Paper
ACCESSORIES: Punches, Watercolour Crayons, Aqua Painters, Stampin' Dimensionals, Whisper White Baker's Twine

Don't forget to come back tomorrow for a look at week #2 in my "For Teacher" series.

Happy Stampin'!

Monday, April 25, 2011

Holy Layers Batman! Can you say EXTRA POSTAGE?

This is my second post for today! Scroll down to see what else I've been doing!

When I saw this card by the lovely and talented Ann Schach, I just KNEW I'd have to recreate it! I mean really, how could you not? It's stunning!!!

Well, between the Creativ Festival and Easter, my "The Open Sea" set (123030 Wood - $32.95; 123032 Clear - $22.95), which will be available to order on May 1st when the Summer Mini launches, was left untouched.

Now, the Creativ Festival and Easter are behind us...the kids are hopped up on chocolate and doing their own thing, I decided it was time to create!

Since I don't have ALL the elements Ann used (I'm missing those GORGEOUS grommets - they'll be on my next order!), I had to improvise. I used these Antique Brad (117273 - $7.50) instead. I chose these ones in particular because I thought they looked a lot like a compass - carrying the theme!


I sure hope Ann doesn't mind my shameless CASEing of her card, because these elements are laid out exactly the same on her card.  Why mess with perfection?


Here's the completed card:


It's all in the details:
  • Antique Brads - going rustic
  • Distressing - a LOT of Early Espresso Ink
  • Sponging - the Whisper White on which I stamped my images was a little too stark for my liking so I sponged all over them after I cut them out using my Early Espresso Classic Ink and a sponge
  • Layers - oh how I love them!!! IMO, you can NEVER have too many layers on a card - sure, there's extra postage to be paid, but it's worth it
  • Baker's Twine - not even available yet (will be May 1st) and I'm already crossing all my parts that it will be carried over into the new Idea Book and Catalog for the 2011-2012 year...LOVE this stuff!
Inside:

I continued sponging on the Whisper White so it wasn't so stark and layered the Whisper White Cardstock on the same piece of DSP that I used in the small panel on the front before adhering it to the inside of the card.

I stamped the Happy Father's Day on the inside as this will be FIL's Father's Day card. When I first saw this set, I just KNEW it would be perfect to create cards for him as he just loves boats and has even made a few rather large replica sail boats himself.

What do you think?

STAMPS: The Open Sea, Teeny Tiny Wishes
INK: Early Espresso, Not Quite Navy
PAPERS: Whisper White, Cherry Cobbler and Not Quite Navy Cardstock; Nautical Expedition DSP
ACCESSORIES: Bakers Twine, Antique Brads, Metallic Brads and LOTS of Stampin' Dimensionals

Happy Stampin'!

MDS Monday - Engineer in the Making

My BIL is an engineer. He studied for years and now owns his own construction business. So, ummm...if you need anybody, let me know!

Meanwhile, he's building a house for himself, my sister and their family.  When we visited last summer, the house was pretty much done (on the outside), but there were still some things that needed to be done.

Never one to shy away from work, Jonathan wanted to help:


He looked SO DARN CUTE in the construction hat, that I just had to snap a few pics!

Happy MDSin'!

P.S. Don't forget!  Ten Card Class is THIS Saturday, April 30th!!!  Check it out here.

Thursday, April 21, 2011

Did You Know?

Exclusive Products
Stampin' Up! manufactures many of its own products, and contracts with other manufacturers to offer products exclusive to Stampin' Up! 

Exclusive Colours
Each of our exclusive colours is organized into one of our colour collections : Brights, Regals, Subtles, and Neutrals. Once you have selected your colour scheme, you have a full range of coordinating products to choose from while taking the guesswork out of color coordination. 
We also have an In Colour palette with five of the year's hottest colours. These shades are exclusive to our product lines, and you'll love how we incorporate them into our Designers Series paper, kits, and embellishments. 
Each year, we'll introduce five new In Colours, and you'll be able to enjoy them for two years. Just think, starting in 2011, you'll always have 10 trendy In Colours to choose from.

Exclusive Designs

Our award-winning rubber stamp art and designed products are created by our talented artists and designers, and are not available anywhere else in the crafting world. 

Wednesday, April 20, 2011

Watercolour Wednesday - For Teacher

This is week #1 of this series.  In the coming weeks, I'll be showing you four different cards that are just PERFECT for children to give to their teachers at different times of year.  Buy the set, and you're covered for the year!

My first card is a halloween card and my little painted lady is just too cute!

Since this is WATERCOLOUR Wednesday, she is, of course, water coloured.

I used my watercolour crayons (as usual) - don't know what I ever did without 'em! When I was done, I sponged around the outside edge of the punched image (used my 2 1/2" circle punch) using Concord Crush Ink.

My card base is Sahara Sand (which I'll use for all four cards) because I wanted a neutral shade and because I have LOTS of it - LOL!

I sponged the edges of each layer using matching ink for a little added interest and dimension.


 Here's some of the sentiment detail:
  • stamped in Concord Crush
  • Punched with Word Window Punch
  • Layered on Pumpkin Pie Modern Label Punch
  • Adhered with Stampin' Dimensionals ('cause you know me and those Dimensionals!)
And of course, the inside is finished with a strip of matching Designer Series Paper on Whisper White Cardstock.


What do you think?

STAMPS: Greeting Card Kids, Teeny Tiny Wishes
INK: Staz-On, Concord Crush, Pumpkin Pie
PAPERS: Sahara Sand, Pumpkin Pie, Concord Crush and Whisper White Cardstock; Watercolour Paper; Concord Crush DSP from Hostess Level 1 pack
ACCESSORIES: Punches, Watercolour Crayons, Aqua Painters, Stampin' Dimensionals

Happy Stampin'!

Monday, April 18, 2011

MDS Monday - SWIM

Yes, I KNOW it's Tuesday! And yes, I KNOW by the post date, this actually LOOKS like it was posted on Monday night...but yeah, SO not!!!

Anyway, here's my MDS Monday on a Tuesday:


I used Marina Mist and Not Quite Navy on this one. And my littlest man...of course!

Happy MDSin'!

Thursday, April 14, 2011

Did You Know?

Stampin' Up! offers combinations of stamps and accessories specifically designed to work together to create a pleasing, consistent feel. These combinations simplify the project-making process--you can choose a theme, select its coordinating products, and plan your project. Here we present projects to demonstrate various project types you can make with one style.

Each year we're excited to share our exclusive collections inspired by the season's hottest trends. We consistently refresh our Style Watch lines to make sure we're providing up-to-date stamp sets and embellishments that fit your style and coordinate effortlessly.

Product Coordination
Each collection features products that coordinate in colour, texture, and theme. You may see different components in each line, but you'll always see several stamp sets, a coordinating alphabet or wheel, and several embellishments (think Designer Series paper, punches, ribbon, Accents & Elements, Rub-Ons, and more) to put the finishing touch on your projects.

Wednesday, April 13, 2011

Ten Card Class Preview

*WATERCOLOUR WEDNESDAY WILL RETURN NEXT WEEK*

I'll be teaching my first class as a Stampin' UP! demonstrator on April 30th and I couldn't be more thrilled. Creating the cards I'll be showing you is SO much fun!

Today, I thought I'd show you one of the cards we'll be making.  It uses our Greenhouse Gala Designer Series Paper.  I'll admit that when I first saw this paper, I was SURE it wasn't for me.  Having seen samples using it and now making cards using it myself, I've fallen in love with it!


If you can't make it to class, here are the step by step instructions to make this card:

  • Cut a piece of Daffodil Delight Cardstock to 5 1/2" x 8 1/2" and score it at 4 1/4". Fold it in half.
  • Cut a piece of Greenhouse Gala Designer Series Paper to 4" x 5 1/4" and adhere to the front of the card base.
  • Cut a different pattern of Greenhouse Gala Designer Series Paper to 1 3/4" x 4 3/4" and mat it on a piece of 2" x 5" Chocolate Chip (yes, it looks like Basic Black in the photo - I promise it's Chocolate Chip!).
  • Cut a piece of 2" x 3" Whisper White Cardstock on which you will stamp your focal image.  For this card, I used Aviary. Mat your Whisper White piece on 2 1/4" x 3 1/4" piece of Daffodil Delight and again on a piece of 2 1/2" x 3 1/2" of Chocolate Chip.  Adhere to front of card, using Stampin' Dimensionals.
  • Stamp just 4 you (or sentiment of your choice) from Hodgepodge Happiness in Chocolate Chip on Whisper White Cardstock. Punch out using Word Window Punch. Mat in on piece of Chocolate Chip Cardstock punched with the Modern Label Punch. Adhere to front of card using Stampin' Dimensionals on ONE end and adhesive on the other.
Now...if you want directions for the other NINE cards we'll be making, you'll have to come to class!

Class will be held on April 30th at 1 p.m.  There is only enough space for 10 stampers, so you want to register EARLY!

COST: Register and pay by April by April 17th and pay only $25; after April 17th and up to including the 24th, pay $30.
SPECIAL OFFER!!!  Bring a friend and when you register and pre-pay for BOTH of you, you'll pay only $20 each!!!

Contact me directly to register for class and I'll send you a PayPal invoice.

Happy Stampin'!!!

Tuesday, April 12, 2011

Strength and Hope for a friend in need

The Strength and Hope Stamp set will be available in the Summer Mini beginning May 1st, 2011.  It's sale will see $2 per set donated to the Breast Cancer Research Foundation. In my travels through cyber space, I have seen a LOT of cards made with this set and, in my opinion, you just CAN'T make a bad card with this set. It's just not possible!

When I found a GORGEOUS card by Lianne Carper, I just KNEW I would have to CASE (Copy and Share Everything) it. It will be going to a friend's sister who is battling cancer.

Here are some of the bits and pieces:

I love the butterfly that comes with this set. I especially love cutting it out and layering several of them. I learned this trick from a fellow demonstrator named Tana. I've seen her do it with the butterfly punch, but it works with this one too.


In this next photo, you can see that I used Stampin' Dimensionals on the wings. By adding Glue Dots to the centre of the butterfly and squishing all three butterflies together, you can achieve the illusion of  a flying butterfly. LOVE THIS!


Here's the bow detail. If I'd had some of the new Whisper White Baker's Twine that will be available in the new Summer Mini, I would have used that.  I haven't finalized my Summer Mini order as of yet, but when I do, you can be sure the Baker's Twine (in all three colours!) will be on it!


The sentiment in this set is the letter "H" and the word "hope".  There's also three rows of words. I stamped these behind the "H" in River Rock Ink on Whisper White Cardstock. I had to stamp it twice - this was easy to do since I have the clear mount version of this set. I used more Stampin' Dimensionals for the sentiment.

Here's the completed card:


What do you think?

STAMPS: Strength and Hope
INKS: River Rock, Not Quite Navy
PAPERS: Whisper White and Not Quite Navy Cardstock; Paisley Prints DSP
ACCESSORIES: Ribbon, Punches, Linen Thread, Button, Stampin' Dimensionals

Happy Stampin'!

Monday, April 11, 2011

MDS Monday - Photo Background

Imagine my excitement when I discovered that you could actually use a WHOLE PHOTO instead of background paper!  If you figured this out months ago, please don't laugh at me!

I whipped this one up in a couple of minutes (OK, maybe like 15 or so...) while I was hanging out with my most awesome downline Diana before her OSW (that's one sheet wonder) class.


My favourite part of July 1st festivities has ALWAYS been the fireworks show at the end of the night.  I've had to cover the kids ears for a few years, but I still don't miss it!

This layout is VERY simple!  One photo for the background and three smaller photos at the bottom, matted with Whisper White.

Have yourself a great MDS day!

Saturday, April 9, 2011

Stamping 411 in Bright and Cheery Colours!


The temperature is up to 13C where I am!!!  That's about 55F for my American friends - WOOT! So, today's card brings bright and cheery colours ready for summer.  Yes, I KNOW spring has BARELY started, but I am SO ready for warm summer weather!

For my card, I decided to play along with the operators at Stamping 411!

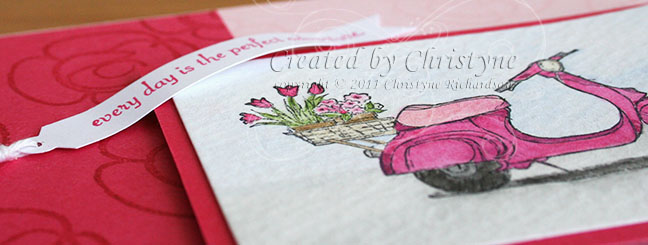
 What do you think of this?  I just love this bow! And how's that for bright and cheery? Nothing says happy like Real Red! Our taffeta ribbon is one of my favourites to use.  It's so soft and supple - it makes FABULOUS bows!

You know what else? It come is 11 colours! You can see them all here.


If you know ANYTHING about me, you know how much I LOVE layers!  If I was ever down to only one package of Stampin' Dimensionals, I think I might start having heart palpitations - LOL! When I place my demonstrator orders, there's ALWAYS at least one package on there! Good thing I can get them for 20% off...you can too if you join my team!  All your favourite Stampin' UP! products for at least 20% off as long as you remain an active demonstrator. Cool, or what?

The sentiment, in this case, wasn't attached with Stampin' Dimensionals.  I simply added a bit of Snail under the end that was on top of the image panel and let it "float" off the edge.

And now...without further ado...the full card front! Like I said - BRIGHT AND CHEERY! I didn't have any DSP with the colours I wanted to use, so I just made my own! Love, love, LOVE that I can do that!


I stamped the flower from Bold Blossom using Real Red, Tangerine Tango and Tempting Turquoise Ink on a 4 x 5 1/4" piece of Whisper White Cardstock before adhering it to my Tempting Turquoise Base.

This is such a fun little stamp set! And it's inexpensive too - only $15.95 for wood mount and $11.95 for clear mount.  You can't beat that!


Tips from the Heart for making your own Designer Series Paper:
  • Start with the largest stamp first. In this case, that didn't matter as I was only using one image. Your smaller images are GREAT for filling in gaps, so save them till last.
  • Start with the lightest colour first. If you start with darker colours, you're going to find the piece overwhelming.
  • Fill in the gaps.  The best Designer Series Paper is COVERED. You want your Designer Series Paper to be the same.
  • Make a WHOLE sheet!  For my card, I only made one panel, but you can make a whole sheet of your own Designer Series Paper.  This is known as a "one sheet wonder" and is often cut into smaller pieces to get many cards from one sheet of paper.
  • Have fun! Don't try and be too precise or your paper will look like it was store bought.  You want it to be fun and whimsical. You want it to be a part of you!

When I first started making cards, I almost NEVER finished the inside of the card. But after awhile, I started thinking that all the cards you can BUY in those card stores are all finished on the inside.  Sometimes it's only a sentiment, but still.  Most of my cards DON'T have a sentiment inside (unless it's specifically requested by a client), but I do like to finish them on the inside now.  Sometimes it's a stamped image.  Sometimes it's an extra strip of Designer Series Paper. Just a little extra something to show again how much you care.

I hope you enjoyed my little bit of summer!  Why don't you leave me a quick comment and let me know what you think?

STAMPS: Bold Blossom
INKS: Old Olive, Real Red, Tangerine Tango, Tempting Turquoise
PAPERS: Whisper White, Real Red, Tangerine Tango and Tempting Turquoise Cardstock
ACCESSORIES: Real Red 3/8 Taffeta Ribbon, Stampin' Dimensionals, Punches

Happy Stampin'!

Thursday, April 7, 2011

Tiny Tags for a friend - Simply Adorned

Have you experienced Stampin' UP!'s jewelry line, Simply Adorned?  It's simply GORGEOUS!

Here's just one sample from the Stampin' UP! website:


Isn't it darling?  The set used is Tiny Tags - it's not JUST for tags! It's the perfect size for these tiny little charms, which are available in sizes from 5/8" (square and round) up to 1 1/2" X 2" (rectangle).  The size shown here is the 1" square charm.

Each charm comes in a plain brown box which can be EASILY decorated, making it just perfect!  What's more, you could even create a matching card!

What do you think?

STAMPS: Tiny Tags
INK: Chocolate Chip, Old Olive, Sahara Sand; Crushed Curry (retired, but could be replaces with Daffodil Delight)
PAPERS: Very Vanilla and Rich Razzleberry Cardstock
ACCESSORIES: Simply Adorned Line of Jewelry

Happy Stampin'!

Wednesday, April 6, 2011

Watercolour Wednesday - The Nicest Things

I love doing nice things for people...especially friends.  One of my favourite things to do (of course) is send/hand deliver a card.

This morning, I noticed a friend was having a pretty rough day (gotta love Facebook!), so I let her know that I would be in her area and if she needed an afternoon pick me up in the way of a visit and coffee that I would make myself available.

She had a meeting that she had to take over her lunch, so she had NO spare time. I really wanted to brighten her day, so I made a card and dropped it off with the receptionist at her workplace.

My card did the trick because when I was on my way home, I received a notification (again, gotta love Facebook!) that she had received the card and was absolutely thrilled with it.  She said I had made her smile in what was an otherwise bad day.  Mission accomplished!

Wanna see?

Look at all those layers!  YUMMY!  And dimensionals?  Oh yeah baby!  I used 14 of those things on this card!


Here's the inside (before I wrote all the mushy stuff!):


And now...what you've been waiting for!!!  The card front!


It's Sketch Challenge day over SplitCoast Stampers, so I used that as my starting point.  The main image panel was PERFECT for an ATC sized image and these two sweet little girls from "The Nicest Things" were a great fit!

The first thing I did was cut down my watercolour paper.  It comes in 3 3/4" x 5", but since I wanted an ATC, I cut it down to 2 1/2" x 3 1/2".  You can get TWO ATC out of one sheet of watercolour paper! Then I stamped the girls in Staz-ON ink as this is the best ink for watercolouring.  It doesn't matter how much water you use, this stuff just DOES. NOT. RUN.

Then I just went to town with my watercolour crayons and aqua painters. I used colours from all four families on this one, so I don't think I can list all of them.

Once my image panel was completely dry, I matted in on a piece 2 5/8" x 3 5/8" piece of Baja Breeze Cardstock.  Then, I just started adding layers like on the sketch till I was happy with the results and stuck it all down.

On the inside of the card, I layered a piece of Whisper White over some Paisley Petals Designer Series Paper (DSP) and stamped the sentiment and little bunny in a pot from the same set. Is that bunny not the cutest thing you've ever seen?

What do you think?

STAMPS: The Nicest Things
INK: Staz-ON, Cherry Cobbler, Chocolate Chip
PAPERS: Crumb Cake, Baja Breeze and Whisper White Cardstock; Paisley Petals DSP
ACCESSORIES: Watercolour Crayons, Aqua Painters, Brads, Stampin' Dimensionals

Happy Stampin'!

Tuesday, April 5, 2011

Love a Deal? Get it NOW!!!

Stampin' UP! has restocked the Clearance Rack and it's LOADED with goodness!  There are even some Grab Bags available where everything is a surprise! And, really...who doesn't love surprises?

Just imagine...you spend $18 and get $72 worth of product!  And it's not like we're talking penny candy here...we're talking the genuine article! 100% Stampin' UP! awesomeness!  You can't beat that!


Don't wait though!  Head on over to the Clearance Rack now, before it's all gone!

Please note: Clearance Rack merchandise can only be purchased through an online order.

HAPPY SHOPPING!

Monday, April 4, 2011

MDS Monday - It's just a little makeup!

Last year, my daughter had to opportunity to be part of a series of one act plays at her school.  She had a part in "The Devil and Daniel Webster" as one of the "jury members".

Of course, before the play could take place, there had to be dress rehearsals, set work, make up trials...there's lots to do as I'm sure you can imagine.

So, one day, she came home from school, looking like this:


What's a mom to do?  Take pictures of course!

I used MDS once again, because of course...it's MDS Monday! My background is textured Concord Crush cardstock and I "stamped" using Extreme Elements in the same colour as well as Whisper White on which I reduced the opacity.  The text was added using Whisper White.

Happy MDSin'!

Friday, April 1, 2011

Four Frames and Some Tiny Wishes

My apologies for the late day posting! It's the first day of pre-orders for Stampin' UP! demonstrators, so things are little hectic to say the least!

I haven't had the chance to finish up my card using the ATC posted here, but I didn't want to leave you hanging, so here's a little card straight from the Stampin' UP! website:


This little note card is SO adorable and perfect for showcasing the Four Frames Stamp Set and Paisley Petals Designer Series Paper. It would be PERFECT attached to a small gift or a bouquet of flowers.

Want to learn how to make it? Sign up for my 10 card class on April 30th and I'll show you how! It's just ONE of the ten fabulous cards we'll be making in class!

It uses the Decorative Label Punch as well as the Boho Blossoms and 2-Step Bird Punch.  A little 1/2 circle punched out of the focal image makes a spot for the flowers.

What do you think?

STAMPS: Four Frames, Teeny Tiny Wishes
INK: Cherry Cobbler, Early Espresso, Old Olive
PAPERS: Cherry Cobbler, Watercolour Paper; Paisley Petals DSP
ACCESSORIES: Aqua Painters, Punches, Ribbon

Happy Stampin'!