Sign UP

Thursday, August 25, 2016

For You 3-D Thursday!

It's not *exactly* 3-D since it's still kinda flat, but it's not a card, so that's something...right? :)

Check this out:


These came about because I misheard the directions in a video for something you'll see next week. I was merrily creating along and when I had made them all, I realized that they were too big for the project I was *actually* working on. Now you'll have to wait for next week to see it - LOL!

I started off with a 5 ½ x 5 ½" piece of Blooms & Bliss Designer Series Paper (I'm almost out of the blue/green papers - good thing I have another pack on standby!) and created a gift card size envie using my Envelope Punch Board. Then I went a little NUTS with the sponging...it's pretty much EVERYWHERE!

For the belly band, I stamped on Whisper White Cardstock using the splatter stamp from Touches of Texture and Mint Macaron Ink (which I stamped off first) and then stamped the large flower image in Island Indigo. The sentiment is from Thoughtful Branches (which is only available for a few more days!)

I added some Basic Rhinestones, because you can never have too much bling!

What do you think?

STAMPS: Touches of Texture, Thoughtful Branches
INK: Mint Macaron and Island Indigo
PAPERS: Whisper White Cardstock; Blooms & Bliss DSP
ACCESSORIES: Envelope Punch Board, Punches, Basic Rhinestones, Stampin' Dimensionals

Happy Stampin'!

Product List

Links by TheseAreMyStamps.com

Wednesday, August 24, 2016

Fire! FIRE!!!

Have you ever been to a birthday where there was more candles than cake? If you ever have to go to another one, this card would be perfect!

Check it out:


SO many candles! And SO much fun! The Birthday Banners stamp set was just perfect for this weeks Paper Crafts Crew Sketch (last week too, but I digress!). It took about a week for this idea to come together in my head, but I just LOVE the way it turned out!

The candles (there are 6, one is hiding) and flames (also 6, with one hiding) were fussy cut and adhered to the black panel using both SNAIL and Stampin' Dimensionals (depending on the layer). The sentiment was stamped in Archival Black Ink and Melon Mambo Ink and die cut using the Bunch of Banners Framelits. The Birthday Banners and Bunch of Banners Framelits are going to get LOTS of use this year I think! :)

Did you know that you can also get the Bunch of Banners Framelits as a BUNDLE? They'll come with Banners for You stamp set:


To finish off my card, I carried the candle theme to the inside:


What's one more candle, right??

What do you think?

STAMPS: Birthday Banners
INK: Archival Black, Melon Mambo, Bermuda Bay and Crushed Curry
PAPERS: Whisper White and Melon Mambo Cardstock; Pop of Pink DSP
ACCESSORIES: Big Shot, Bunch of Banners Framelits, Stampin' Dimensionals

Happy Stampin'!

Tuesday, August 23, 2016

Slip Sliding Away!

Oh my word!!! These cards will slide their way right into your heart!


Happy Stampin' and Slidin'!

Monday, August 22, 2016

Just wanted to say...

LOVE YOU!

When I received my Paper Pumpkin last week, I knew it would be perfect for the Freshly Made Sketches sketch and I was right!


See? Told you it was perfect! This one is 100% going to my honey, but I think I'll take it with me on our upcoming vacation. I have his 25th anniversary card already, but what's one more, right? It's paper, it packs flat!

Details & Digits:
  • Base: Island Indigo, 4 ¼" x 11" scored at 5 ½"
  • Layer: Mint Macaron, 4" x 5 ¼"
  • Layer: Whisper White, 3 ¾" x 5"
  • Layer: Blooms and Bliss DSP, a bit I had leftover and cut
  • Sentiments: Stamped in Island Indigo
  • Love You: Punched using 2" circle punch and layered with the next size up in Thinlits
  • Doodling: Island Indigo
Here's the inside:


What do you think:

STAMPS: My Pape Pumpkin - August Kit
INK: Island Indigo
PAPERS: Whisper White, Mint Macaron and Island Indigo Cardstock; Blooms & Bliss DSP
ACCESSORIES: Big Shot, Circle Thinlits, Punch, Marker, Stampin' Dimensionals

Happy Stampin'!

Sunday, August 21, 2016

AMAZING!

Today's card from the CPC series may well just be my favourite! You'll have to tell me which one is YOUR favourite once you've seen them all. :)


The card base and layer are both Soft Sky (or maybe Pool Party?) and I stamped all over the base and layer using the matching ink.


For the inside, I repeated the splatter on both the card base and the Whisper White layer - I like this effect!

What do you think?

STAMPS: Gorgeous Grunge, Touches of Texture
INK:
PAPERS:
ACCESSORIES: Butterfly Punch, Linen Thread,

Saturday, August 20, 2016

Quick & Cute with a little OOMPH!

Today's Quick & Cute card is actually a whole Paper Pumpkin Kit! It's a little bit more involved than my regular Quick & Cute cards, but everything you need (except for adhesive and a clear block) is already in the box! And as an added bonus, it gets delivered right to your door.

This months Paper Pumpkin is just perfect when you need something Quick & Cute. You can make up the cards as you need them, or make them all at the same time and be ready to go. :)

Here's the bits in the kit:


Everything you need to create comes out of the box. If you're already a Paper Pumpkin subscriber, you received a block in your first kit and if you're just thinking about it, you'll get that block in your first kit. Other than that, all you need is adhesive (and if it's a specialty adhesive, like glue dots or Stampin' Dimensionals, that's in the box too!)

And the stamp set:


I love that corner image! It was stamped four times on the largest of the cards in the kit to form a beautiful frame! And once all your cards in the kit are complete, you'll get to use the stamps in other ways! Heads up! I'll be showing you a card on Monday that uses the stamp set with other Stampin' UP! supplies.

And, last but not least, the finished cards:


I love the way these turned out! There's three regular sized cards (4 ¼" x 5 ½"), three note card sized cards (3 ½" x 5") and three little pockets with a note inside that are sized to hold a gift card to someone's favourite store!

Did you know that as a Paper Pumpkin subscriber you can also order back kits from previous months? This privilege is only available to current Paper Pumpkin subscribers and I love that little perk! If I get a kit that I REALLY like, I can order another one (or two or three) when I place my next Stampin' UP! order. How cool is that??

You can sign up for Paper Pumpkin HERE and if you do so before the end of September, you'll only pay for one kit and your next one will be FREE!

What do you think?

SUPPLIES: August Paper Pumpkin Kit

Happy Stampin'!

Friday, August 19, 2016

Thanks!

Here's card #2 from the Celebrate Box you saw in yesterday's post.

This one started off with a base of Basic Black Cardstock, onto which was layered Soft Sky and Whisper White (stamped panel). It was stamped with Soft Sky, Crushed Curry, Smoky Slate and Dapper Denim and then I embossed using Versamark for stamping and Gold Embossing Powder.

The Whisper White Cardstock was layered onto the Soft Sky and tied with a length of Linen Thread.

A piece of doily was adhered behind the the image panel and the whole thing was adhered to the Basic Black base.


The inside:

I think the inside is even MORE pretty than the front if that's at all possible! It was stamped in Soft Sky, Crushed Curry, Smoky Slate and Dapper Denim. Embossing was done again to match the front using Versamark and Gold Embossing Powder.

What do you think?

STAMPS: Gorgeous Grunge, Touches of Texture, Watercolour Wishes
INK: Soft Sky, Crushed Curry, Smoky Slate, Dapper Denim and Versarmark Ink
PAPERS: Whisper White, Soft Sky and Basic Black Cardstock
ACESSORIES: Embossing Powder, Heat Gun, Linen Thread

Happy Stampin'!


SaveSave

Thursday, August 18, 2016

Celebrate 3-D Thursday!

Have you heard of Craft Project Central? It's pretty awesome! It's a paid subscription, but TOTALLY worth it! You get 10 projects each month for just $10 and if you subscribe to at least two months in a row, you get a bonus project too! I don't buy the subscription *every* month, but when I do, I'm NEVER disappointed!

Today's project comes from July 2016 (yes, you can purchase back months) and I was SO thrilled with the way it turned out! Check it out:


It's a box set of five cards (but there's space in there for at least one more AND envelopes too! The box is created with two pieces of Dapper Denim and a piece of Smoky Slate Cardstock. And the stamped image panel is a belly band that comes off:


Of course, now that I'm looking at in an actual blog post, I'm wishing I'd stamped the lid/flap too. Not that you can see much of it when the belly band around it, but still. Does that ever happen to you? You create something, it's awesome, you take a picture and...you think of at least three different things you could have done to make it even MORE awesome! In the next version, I think I'll stamp the flap. :)

Would you like to see the cards on the inside??

I'll share one with you today and then you'll have to come back over the next week or so to see the rest. OK?


I love the way this card turned out! Unfortunately, the paper doily is retired (there's NEW ones that are even prettier, so don't despair!), but all the rest of the goodies I used can be ordered right HERE.

I started off with a base of Crushed Curry Cardstock cut to 5 ½ x 8 ½" and scored at 4 ¼". I stamped all over it using the flower from the Touches of Texture Stamp Set. Next, I attached the doily.

Then I got to work on the image panel. It was stamped & embossed with Gold Embossing Powder (you could use copper) and then stamped in Smoky Slate using the Gorgeous Grunge Stamp Set. I love using background/collage stamps because there's SO much you can create with all the images! Collage backgrounds are really "in" again this year, so these stamp sets should be on your must have lists.

The sentiment comes from the Watercolour Wishes Project Kit. This kit comes with EVERYTHING (except adhesive) to create 20 beautiful cards. Once you've created all the cards, you still have a beautiful stamp set that you can use over and over again!

The finishing touch was linen thread wrapped about the Whisper White Cardstock a couple of times and tied in a bow.

Here's the inside:


I stamped the long image from Touches of Texture and sponged the edges of the Whisper White Cardstock. And...like to box, I think it needs something "more". I think I'll doodle a design around the edge of the Whisper White panel.

What do you think??

STAMPS: Touches of Texture, Gorgeous Grunge, Watercolour Wishes
INK: Archival Black, Crushed Curry, Dapper Denim, Smoky Slate and Versamark Ink
PAPERS: Whisper White, Basic Black, Crushed Curry, Dapper Denim, Smoky Slate
ACCESSORIES: Embossing Powder, Heat Gun, Linen Thread, Stampin' Dimensionals

Happy Stampin'!

Wednesday, August 17, 2016

Let them eat cake!!

When I showed today's card to my son, he asked if any of my French relatives knew anyone named Marie (for Marie Antoinette) and so...that's how the title of the post came about - LOL!

Today's card is SERIOUSLY cute (if I do say so myself) though I may have gone a little bit crazy with my favourite colour - PINK!!


When I first saw the Pop of Pink Specialty Designer Series Paper in the 2016-2017 annual catalogue, I was pretty sure Stampin' UP! was inside my head! How else could they know I would be that excited over paper?

Today's card is all about the pink...with a teeny tiny nod to Bermuda Bay.


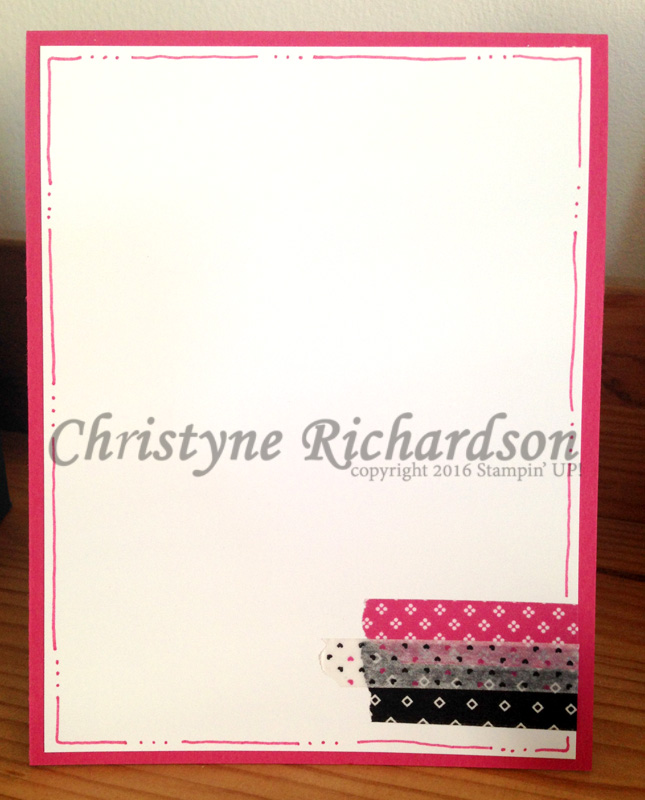
I started off with a piece of Basic Black that was laying around from some other things I was working and added a layer from the Pop of Pink DSP. Then I stuck on some Pop of Pink Washi Tape and punched a hole to add the Whisper White Baker's Twine.


Next up was the focal point of the card - balloons and banner! I started off with the Basic Black piece of DSP and added a layer of Whisper White. I stamped and punched the balloons using Melon Mambo and Bermuda Bay Ink and then punched a third balloon from one of the gold embossed pieces of DSP in the Pop of Pink Pack. The baker's twine was attached with a glue dot and then Stampin' Dimensionals were added to pop them up.

The sentiment was attached with Stampin' Dimensionals too and I tied the balloon strings with another piece of baker's twine.

On the inside, I repeated the washi tape and added some doodling with my Melon Mambo marker.


And that's it! If you'd like to order any of the products I used in this cards, click on the links below and they'll take you right to my online store. Be sure to use code: C4SYKEKG to be eligible for free product!

What do you think?

STAMPS: Birthday Banners
INK: Archival Black Ink, Melon Mambo Ink, Bermuda Ink
PAPERS: Melon Mambo, Basic Black and Whisper White Cardstock; Pop of Pink DSP
ACCESSORIES: Big Shot, Dies, Pop of Pink Washi, Marker, Stampin' Dimensionals, Glue Dots

Happy Stampin'!


Product List

Links by TheseAreMyStamps.com

Tuesday, August 16, 2016

Monday, August 15, 2016

Just for you

Oh. My. SQUEEEEEEEEE!! My pre-order for the Holiday Catalogue arrived last week and I finally got a chance to sit down and play with it - WOOHOO!!!

I've been working full time for the past week (and repeating that this week) at Georgetown Yarn while my dear friend (and owner) Betty-Anne is on vacation with her family, so playtime is on Sundays and Mondays until the end of this week.

I couldn't wait to get started playing with the new goodies and the Freshly Made Sketches sketch was PERFECT for it! I'm cutting it close to the wire, but better late than never, right??

How cute is this:


I love everything about this whole suite in the Holiday Catalogue and I can't wait to share MORE of it with you! I don't want to make you nuts with all the Christmas stuff, so until the Holiday Catalogue goes "live" to non-demonstrators, I'll only be sharing bits and pieces occasionally.

I started off with a base of Real Red Cardstock and added a piece of Designer Series Paper from the Candy Cane Lane DSP pack. How cute is that paper???

Then I stamped the images onto Whisper White Cardstock and added a layer of Crumb Cake behind it...though I might change that up and use Early Espresso for my upcoming class in order to add a bit of contrast.

A strip of Candy Cane Lane DSP was added under the image panel and I used a partial image (just for you) to stamp on the strip of Whisper White Cardstock. Our markers are GREAT for colouring in portions of stamps!

The finishing touch was some bling! Because EVERYONE needs a little bling at Christmas, right? :)

I stamped on the inside too:


I just love all the little images in this set...they'd be perfect for tags too!! Which gives me an idea for my next Christmas post! Stay tuned...

What do you think??

STAMPS: Candy Cane Christmas
INK: Garden Green, Real Red and Crumb Cake
PAPERS: Whisper White, Real Red and Crumb Cake Cardstock; Candy Cane Lane DSP
ACCESSORIES: Markers, Basic Rhinestones

Happy Stampin'!

Saturday, August 13, 2016

I'll be your up...

...when you're feeling down.


This image and sentiment are so perfectly cute! I just LOVE them together!

Recently I was chatting with a dear friend who had been having a particularly difficult day and I showed her this adorable image. She said I must have known she needed a bit of boost. I don't think I'm particularly *that* intuitive, but I was glad to have made her smile just a little. :)

This card was so quick and easy to make! I stamped the image in Archival Black Ink on Thick Whisper White cardstock and coloured it in using ink and my Aqua Painter. I used sponges to add a bit of "background" in Soft Sky. The balloon was stamped a second time and coloured in Daffodil Delight. Then it was cut out and attached over the stamped balloon to add a little dimension.

Easy, Peasy, DONE!

What do you think?

STAMPS: Bella & Friends
INK: Archival Black, Smoky Slate, Calypso Coral, Wild Wasabi
PAPERS: Thich Whisper White and Soft Sky Cardstock
ACCESSORIES: Aqua Painter, Stampin' Dimensionals

Happy Stampin'!

Friday, August 12, 2016

16 more sleeps and a plane ride!

No cards today! Just me, waxing poetic, on how awesome my husband is. You don't mind, right?

This year, we're celebrating our 25th wedding anniversary. Yes, I realize that I look WAY too young to have been married for 25 years, but since I was married when I was 22 and I'm now 47, it's true!

Now, I'm not going to tell you that it's been 25 years of wedded bliss, because that would be a lie. There was a time when we almost didn't make it. But we fought for (and oftentimes, with) each other and somehow we made it through. And I can tell you with absolute certainty that we are stronger as a couple because of it. And I'm thankful for that every day.

So...while there is no picture of a card today, there is this:


A few years ago, my husband introduced me to Europe and more specifically, Paris. And I fell in love. If you ask, I will tell you that we ARE retiring in France...not necessarily Paris, but definitely France. I love everything about the country - the history, the architecture and yes, even the people.

This year, we'll be exploring Lyon. It's the food capital of France. Did you know that? Many people think the food capital is Paris, but it's actually Lyon. I can't wait!

You'll see some photos on my blog and MANY more on my Facebook Page. I can't wait to share it with all of you!

Thanks for letting me go off on a tangent. :)

16 more sleeps and a plane ride!


Thursday, August 11, 2016

Enjoy 3-D Thursday!

I don't know if you know this...but I knit!! I love it when I can combine my paper crafting with knitting - then all my hobbies are happy that they're getting attention - LOL!

I also work at our local (ish) yarn store in Georgetown. Georgetown Yarn is often my home away from home since it's such a fun place to be! They say if you love what you do, you'll never work a day in your life! How fortunate that both my "jobs" are so much fun! :)

Today, I'm sharing a little gift that I created for a friend. We've been super busy at Georgetown Yarn creating kits for upcoming shows (Kitchener Knitter's Fair and Woodstock Fleece Festival) and Lindsay has been our project manager. She's done a GREAT job and since she's a paper crafter and a knitter too, I just knew she'd love this (and I was right! I've already gifted it to her and she was THRILLED!)

Check it out:


This is the little bag before I put the yarn in it. I used a Bow Paper Clip to hold it closed. Bella was stamped in Archival Black Ink on Thick Whisper White Cardstock so I could use my Aqua Painter to colour her in.

The pretty skein of green yarn was too big to stuff inside the little box, so I just used the clip to hold Bella on the front of the box. See?


What do you think?

INK: Archival Black, Dapper Denim Ink, Soft Suede and Real Red Ink
PAPERS: Dapper Denim and Thick Whisper White Cardstock; By the Shore DSP
ACCESSORIES: Big Shot, Circle Framelits, Bow Paper Clip, Aqua Painter

Happy Stampin'!

Wednesday, August 10, 2016

Show me the PAPER!!!

This week over at Paper Crafts Crew, our theme was to focus on the Designer Series Paper. Since I'm in full blown Christmas Class planning, guess what you get? Yep! CHRISTMAS!!

Now...if you're VERY clever and have found me from my Facebook Page, you've figured out that this is one of the cards we'll be making at Christmas Boot Camp in October - DON'T SPOIL THE SURPRISE!!


Many of you who were at my last class in July commented on the card in this post. You liked it SO much, that I decided to recreate it for a Christmas card. You're welcome! :)

My base is Cherry Cobbler and the next layer is Garden Green. The sunburst is arranged on a piece of Very Vanilla which is cut 3 ¾" x 5".

The sentiment is from the Ronald McDonald House Charities (RMHC) Set this year called My Hero. It's a great little set for all kinds of occasions. The bonus? Every set sold means RMHC received a donation from Stampin' UP! To date, we've raised over $1.5 million! How amazing is THAT?

I stamped the sentiment and then punched it out using my 2" circle punch. The layer under that was cut using our new Layering Circles Framelits. I added a bit more colour by doodling with my Cherry Cobbler Marker.

What do you think?

STAMPS: My Hero
INK: Cherry Cobbler
PAPERS: Cherry Cobbler, Garden Green and Very Vanilla Cardstock; This Christmas DSP
ACCESSORIES: Big Shot, Dies, Markers, Stampin' Dimensionals

Happy Stampin'!


Tuesday, August 9, 2016

Ombre? Easy Peasy!

Have you seen the new Stampin' UP! ombre ink pads?


Happy Stampin'!

Monday, August 8, 2016

Just for You

I'm sure you've done it...we all have. You know what I'm talking about...

That stamp set. You look at it and think to yourself, "I don't need that" or "I would never use that". And then you see all sorts of idea...they're on blogs, they're one Pinterest, they're everywhere! And then you see that *one* idea that just does it for you and all of a sudden, you HAVE to have the stamp set!

That's what happened to me with Bella & Friends. We don't have a parrot...or a turtle...we don't even have a dog! And I didn't need the set...and then it was EVERYWHERE! And everyone was making SO many cute cards with it that I. HAD. TO. HAVE. IT.

Now, mind you, today's card isn't *the* one that put me over the edge, but it's pretty darn cute!

Check it out:


I started off with a base of Thick Whisper White Cardstock and added a layer of Soft Sky Cardstock. The image was stamped using Archival Black Ink onto Thick Whisper White Cardstock.

I used my inks and watercolour pen to colour in the images. Bella is coloured using Soft Suede and Skittles is coloured using Calypso Coral and Wild Wasabi.

I made a whole set of these that I'll be showing over the next little while, so stay tuned!

What do you think?

STAMPS: Bella & Friends
INK: Archival Black, Soft Suede, Calypso Coral, Wild Wasabi Real Red
PAPERS: Thick Whisper White and Soft Sky Cardstock
ACCESSORIES: Watercolour Pen

Happy Stampin'!

Saturday, August 6, 2016

Simple & Sweet

Sometimes, you just need something simple to convey what you need to say:


Details & Digits:

  • Dapper Denim Cardstock Base - 4 ¼" x 11" scored at 5 ½"
  • Flirty Flamingo Cardstock Layer - 4" x 5 ¼"
  • A Little Foxy DSP 3 ¾" x 5"
  • Scenic Saying Sentiment stamped in Dapper Denim
  • A little bit of Flirty Flamingo and Dapper Denim Ribbon
Inside:


DONE!

What do you think?

INK: Dapper Denim
PAPERS: Whisper White, Dapper Denim and Flirty Flamingo Cardstock; A Little Foxy DSP
ACCESSORIES: Ribbons, Markers, Stampin' Dimensionals

Happy Stampin'!


Friday, August 5, 2016

I love you

I hope you enjoyed 3-D Thursday yesterday! My plan is to bring you something other than a card each week. I hope you'll join me! :)

Today, I'm sharing the most adorable thing you'll see on the internet this week!

Before I put away all the paper I used in yesterday's post, I created a few more things. Check it out:


This first card is my new friend Bella! She's in the stamp set Bella and Friends and she's available for purchase in my online store. You can have her delivered in wood mount or clear mount and I'm sure she'd LOVE to come play with you! :)

My card base is Dapper Denim (quite possibly my FAVOURITE of all the 2016-2017 In Colours) which I stamped with Dapper Denim Ink using an image from the Gorgeous Grunge Stamp Set.

I added a layer of By The Shore Designer Series Paper and then attached my focal image. It was stamped onto THICK Whisper White Cardstock using Archival Black Ink.

Did you know that you can actually watercolour your image stamped in Archival Black Ink? It's perfect for this kind of technique. Now, mind you, you have to be careful to not use TOO much water if you're using Whisper White Cardstock. If you're going to need to saturate your image, you should use our Watercolour Paper, but you can still use the Archival Black Ink.

I tried LOTS of different colours on Bella (those are posts for other days), but I think my favourite is Soft Suede. Once you see all the other ones (over the next couple of weeks), I'd love for you to tell me what YOUR favourite is.

When I was done with Bella, I decided to play with Skittles:


How cute is that??

I started off with Dapper Denim again and added the layer of By The Shore DSP. Skittles was stamped in Archival Black Ink and coloured in using inks and the watercolour pen. The sentiment, stamped in Dapper Denim, is from Good Greetings (retired, sorry!)

I even made a little envie:


I gave the card to my honey and he thought it was so cute. I like leaving little notes on his home computer. I never know when he's going to find them, but when he does, he's always appreciative. Do you leave notes for your sweetie too?

What do you think?

STAMPS: Bella & Friends, Gorgeous Grunge
INK: Archival Black Ink, Dapper Denim, Calypso Coral, Wild Wasabi, Soft Suede, Real Red
PAPERS: Thick Whisper White and Dapper Denim Cardstock; By The Shore DSP
ACCESSORIES: Watercolour Pen, Envelope Punch Board, Stampin' Dimensionals

Happy Stampin'!