Sign UP

Wednesday, September 5, 2012

Perfectly Preserved Paper Craft Crew

SQUEEEE!!! Are you just LOVING the Holiday Catalogue? One of the sets that FIRST caught my eye was the Perfectly Preserved set. It is SERIOUSLY wonderful! My favourite part is that you can strategically stamp the components on a single piece of cardstock and then run the whole thing through the Big Shot with the dies all lined up in one go - YAY!

Check this out:


I had a lot of fun with the flags and building the jar up. TOO CUTE!!


Check out the dimension! I added a dot of Tombo Mono Multi on the leaves/stems of the fruit and attached them before adhering them to the jar using Stampin' Dimensionals. The lid was also attached with dimensionals.

The finishing touch? The tiny little curled label attached with a glue dot! Look for this adorable card in a future class.

Here's the sketch on which it was based:


Won't you join us this week? Be sure to check out the Paper Craft Crew blog to see what the rest of the team has created!

What do you think?

STAMPS: Perfectly Preserved
INK: Early Espresso, So Saffron, Lucky Limeade, Raspberry Ripple
PAPERS: Very Vanilla and Raspberry Ripple Cardstock; Orchard Harvest DSP
ACCESSORIES: Big Shot, Dies, Stampin' Dimensionals

Happy Stampin'!

New BLOG TOUR coming!

This post will be sticky at the top until September 5th. Please scroll down to see what else I've been creating! :)


Tuesday, September 4, 2012

A little Aviary for the Creative Crew

When I first saw this card, it practically imprinted itself on my brain! Of course, now that I want to share my version of it with you, I can't remember for the life of me where I first saw it. *sigh* This getting old business is NOT for sissies! Please let me know if this card idea was originally yours, because I wholeheartedly believe in giving credit where credit is due.

Our "global" theme this month at the Creative Crew is "sewing" in some way. You can expect to see a lot of projects in the Creative Crew gallery at SplitCoast and on my blog that will use fabric, the paper piercer and paper piercing pack, linen thread (must remember to order more!) and other things related to thread and sewing.

Within the global theme, we also create projects with a "focus". Today's project focuses on "fall" or "autumn" if you prefer.

I just LOVE fall - the colours, the beauty, the temperature, the fact that I can wear sweaters, etc. Yes, it's true. I'm a sweater JUNKIE! There was a time when if I brought home a sweater, DH would make me donate TWO to goodwill. It was THAT bad!

Here are my fall cards:


Now, I know that blue isn't traditionally a fall colour, but I just loved the look of Crumb Cake, Chocolate Chip and Not Quite Navy together. Plus, the colour coach said it was a good idea. And really, you can't argue with the colour coach. See why here.


In this up close shot of the sentiment (from Petite Pairs), you can see I went a little nuts with the Colour Spritzer tool. I particularly like using the Colour Spritzer on Very Vanilla Cardstock, because it almost looks like our Naturals White Cardstock, which I'll be featuring in a later post. So, be on the lookout for that!


Yes, my little bird friend (as well as this cage) is fussy cut. You'll remember how much I LOVE doing this (NO sarcasm inserted here - LOL!) from this post...and this one too. It's no secret that I'm a fussy cutting freak and that fussy cutting is my "happy place".

THAT is great news for you! Why? Because if you come to any of my classes in which fussy cutting cutting is involved, I do it all for you! Some of my students might tell you that I'm fibbing because, on RARE occasions, I make them do it for themselves. That doesn't happen often though!

I'm sure you've noticed how straight and perfectly placed the cages are. No? Go ahead and look at the first picture again. I'll wait here...

I used my stamp-a-majig for stamping all the cages so I could get them "just so". If you don't own a stamp-a-majig, I suggest you attend one of my classes. It will quickly become your best friend as it's ideal for two step stamping and scene creation.

What do you think?

STAMPS: Aviary, Petite Pairs
INK: Crumb Cake, Chocolate Chip, Not Quite Navy, Riding Hood Red
PAPERS: Very Vanilla, Not Quite Navy, Riding Hood Red
ACCESSORIES: Punches, Colour Spritzer, Stamp-a-majig, Stampin' Dimensionals

Happy Stampin'!

Monday, September 3, 2012

MDS Monday for the Creative Crew!

It's finally HERE!!!! That day! That day when I can post my first Creative Crew Challenge on my blog for all of you to see!


To say I'm just a little excited would be a GROSS understatement. I do hope you'll share in my excitement as my "stint"on the Creative Crew continues through to the end of December.


Today's layout was a "recipe" layout. Not that it had to include a recipe, but that we had to FOLLOW a scrapbooking recipe in order to meet the challenge! I'm going to like the scrapbooking challenges because they'll give me a chance to S-T-R-E-T-C-H. I haven't done much scrapbooking lately and it's about time I got back into it! It's not like I have a lack of pictures or anything - HA!


Since our theme was "apples", we used an actual recipe as inspiration for all the parts.


Here's the "ingredient" list we were given:

A round layer - the traditional shape of a dumpling
Pacific Point - the plate
More Mustard - the crust
Old Olive - the apple
Stitching - faux, ditigal, or real - the seams of the dumpling
One photo - that's right just one
A tag or die cut - for your journaling
A button or buttons - use as you want, BUT one must be on your title!


And here's my layout:


It's a PERFECT layout for the end of summer break...the kids go back to school TOMORROW - WOOT! 


My littlest man can be a TOTAL goofball sometimes as evidenced by the above photograph. His older brother told him he looked a little like Wolverine with his spiky hair, so I guess this is his interpretation of what Wolverine would look like. Told you. GOOFBALL!


To create the circle behind the photo, I started with a circle punch and the filled it with Pacific Point. Then I made a duplicate and filled it with Whisper White, but reduced the opacity to 30%. Cool, eh?


After that I just started adding things till it made me happy! :) Stitching here, a button there, banners, journalling and the picture.


What do you think?


TOOLS: MDS

Happy MDSin'!

Sunday, September 2, 2012

A little Word Play for the Creative Crew!

You may remember some of my posts from July where I let you know that I was asked to be part of the Creative Crew. That whole thing still seems a little surreal, but here it is September 2nd and it's my first "official" FULL day on the Creative Crew! I could have posted this yesterday but I would have to wait until noon MT and since I'm more than a little OCD, I couldn't bring myself to schedule it that late. Yeah, I know. I'm a freak. *sigh*

Today's card features one of *my* least favourite colours from the 2012-2014 In Colours. You know what that means? It'll finally start to grow on me a few months before it retires and then I'll fall in love with it. The same thing happened with Concord Crush *sigh* There are some of my friends and demonstrators that just LOVE it! Maybe you'll like it too?

In attempt to TRY and like it, I decided to make my first card of this month using Summer Starfruit. Please let me know what you think:


I started off with a Summer Starfruit base and then added a pierced layer of Designer Series Paper from the Comfort Cafe line. The piercing mimics "stitching" which is our general "theme" for the month.

Have you tried out the new Paper Piercing Pack yet? You're going to LOVE it! There's a basic one in the 2012-2013 Catalogue and a festive one in the Holiday Catalogue. I just KNOW you'll want both!

The next layer is a piece of Very Vanilla Cardstock that I sponged using more Summer Starfruit and then stamped with the sentiment from Word Play using Soft Suede.

For the leaves, I stamped using both my Summer Starfruit and Soft Suede Inks. On the smaller leaves, I used the "rock 'n' roll" technique.


You can see the "rock 'n' roll" effect on the small leaf in the far right of the above picture. This look is achieved by stamping in the lightest colour and then "rocking and rolling" your stamp in the darker colour. The idea is to get darker ink around the outside edge.

I added pearls to the bottom right of the card because I thought they were just the right finishing touch.

And of course, I finished the inside of the card:


What do you think?

STAMPS: French Foliage, Word Play
INK: Summer Starfruit, Soft Suede
PAPERS: Very Vanilla and Summer Starfruit Cardstock; Comfort Cafe DSP
ACCESSORIES: Paper Piercer and Essentials Paper Piercing Pack, Basic Pearls, Stampin' Dimensionals


Happy Stampin'!

Saturday, September 1, 2012

It's the first day of BACK TO SPOOL!!!


The KIDS don't go back to SCHOOL (at least in Southern Ontario) until the 4th, but YOU can get a head start on your back to school shopping and be ready for stamping when those little darlings (or not!) are back to class!


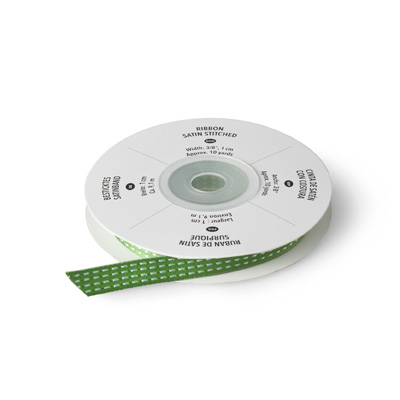
For every $50 you spend, you'll earn a FREE spool of ribbon like the ones pictured in this post. 

What colour will YOU choose???

Friday, August 31, 2012

Birthday Style!

Good morning! It's my wedding anniversary today and while I had planned to show you the card I made for my hubby, it's not done yet. Yeah...I know. And he's off today - YIKES!!! I'll have to be sneaky - LOL! I'll post it one day next week...

On Wednesday, I was asked to step in as the Chat and Challenge Hostess on SUDSOL (Simply Unique Demonstrators Share On Line). SUDSOL is a paid demonstrator group that is worth EVERY penny. There are business tips, an AWESOME gallery, super secret forms to which only SUDSOL members have access. In short, it's DA BOMB!!

Anyway, I'm the coordinator for the Chat and Challenge and sometimes, when someone can't host their time slot, I step in.

While at Regionals in Hamilton a couple weeks ago I received a swap card from the lovely and talented Liz Goldhawk. I didn't have the stamp set she used, but I did CASE her design for the Chat and Challenge.

Check it out:


I used Elements of Style and I just LOVE the way it turned out...right down to that SUMMER STARFRUIT - LOL!

This is a CAS (Clean and Simple) card with minimal stamping, LOTS of white space and not a lot of layers or extra bits and pieces. In fact, if I'd done what I had in my head, there wouldn't even be the Word Window Punch layer as I wanted to stamp the sentiment on the bottom panel. Of course, I got all excited and added the Stampin' Dimensionals to the back of the panels and well...yeah.

What do you think?

STAMPS: Elements of Style, Teeny Tiny Wishes
INK: Baja Breeze, Perfect Plum, Summer Starfruit
PAPERS: Naturals White
ACCESSORIES: Punch, Stampin' Dimensionals

Happy Stampin'!


Thursday, August 30, 2012

It's nearly back to SPOOL time!

Yep! You read that right! Back to SPOOL!!!

Beginning September 1st, Stampin' UP! will have a special offer whereby you can get a FREE spool on the 2012-2014 In Colour ribbon!

The choices?


Which will YOU choose??? Come back on September 1st for ALL the details!

Wednesday, August 29, 2012

Cheers to the Paper Craft Crew!

When I first saw today's sketch, I thought, "Happy I do Day" because I knew it would fit in the circle AND it's mine and DH's wedding anniversary on Friday. But then, I started thinking of bright colours since I had them out from yesterday's card.

So, here's what I came up with:


I started off with the leftover Pacific Point from yesterday and then consulted my colour coach to add the Pumpkin Pie and Melon Mambo.

I stamped the glass in Pacific Point on Whisper White and then punched it out, leaving enough space at the top for the little umbrella, which was (yes, I'm crazy!) hand cut. Then, I added a slit to the rim of the glass and tucked the umbrella in. I added a Stampin' Dimensional under the umbrella.


I stamped the sentiment in Pacific Point and notched one end. Then, the idea of a martini came to me and I wrapped the other end around a toothpick (I cut off the pointy ends) for a nod to the "olives".

I'm sending it to a dear friend who's daughter has been admitted to the hospital AGAIN. If you've been around for awhile, you'll know that Allison is a dear, dear friend and that her daughter is loved as if she were mine. My heart breaks every time she is hurting. *sigh*

Oh dear...my apologies for the downer. :(

Here's the sketch on which my card was based:


I do hope you'll play along with us this week at the Paper Craft Crew!

What do you think?

STAMPS: Happy Hour
INK: Pacific Point, Tangerine Tango
PAPERS: Whisper White and Pacific Point Cardstock; Pacific Point, Tangerine Tango and Melon Mambo DSP
ACCESSORIES: Punches, Stampin' Dimensionals, Marker, Toothpick

Happy Stampin'!

Tuesday, August 28, 2012

Let's go Make a Cake!

OK, I was TOTALLY singing, "Let's go fly a kite..." as I was typing that. Yeah, I know. I'm a little (a lot?) weird like that - LOL!

As you know from this post, I was trying out for the CAS Design Team on SplitCoast Stampers. I'm pleased to tell you that I was chosen as one of the TOP 12!! The top 12 were asked to create a card based on two inspiration photos. The photos were party themed and had banners in them.

Here's my card:


When I saw the inspiration pieces, the first thing that came to mind was the "Make a Cake" stamp set. I learned a LONG time ago that the first thing I imagine is usually the RIGHT thing, so I went with it!

I used my Stamp-a-ma-jig to make sure everything was lined up correctly and stamped my image with Pacific Point, Melon Mambo and Tempting Turquoise. I added the cute little butterflies after the cake was stamped.

I briefly considered using Teeny Tiny Wishes for my sentiment, but decided to go with the "Happy Birthday" from Itty Bitty Banners instead. I'm glad I did. I think it's just PERFECT!

I'll let you know on Friday if I was successful in making the team!


What do you think?

STAMPS: Make a Cake, Itty Bitty Banners
INK: Pacific Point, Melon Mambo, Tempting Turquoise
PAPERS: Whisper White, Pacific Point
ACCESSORIES: Big Shot, Die, Stampin' Dimensionals, Stamp-a-ma-jig

Happy Stampin'!


Monday, August 27, 2012

Digging Hamilton Forever!

Yeah, I know...weird title - LOL!

But, the two cards I chose for today are from two sets with those words in their names.

First, I Dig You:


I just love how cute this set is! The perfect little boy card in MINUTES!

And then, Forever with You:


This card is what's knows as a "hybrid" card. It's created in My Digital Studio, printed and embellished with accessories, to give it some texture. I particularly loved this one because it showcases the "colour change" feature in MDS2. With this feature, you can colour one stamp in many different colours. Too fun!

Thanks for visiting Hamilton with me again today!


Sunday, August 26, 2012

Welcome back to Hamilton!

Did you enjoy yesterday's cards? I certainly hope so, because I've got some more for you today!


Isn't this just happy and cheerful? That's why it caught my eye! I just love the simplicity of adding a bunch of circles to an embossed panel. And that tiny little bejewelled flower? The perfect touch!


Some more happy and cheerful! The tone on tone butterflies just made my day! The new elegant butterfly punch is perfect for adding...well...a touch of elegance!


This collage of hearts caught my eye because I've done one almost the same in the past! I was particularly taken with the word "LOVE" in the hearts. Do you see it? :)


The last card for today is using what's sure to become my very favourite two step stamping set. When Stampin' UP! retired two of my favourite two step stamping sets last year, I was devastated. But then...they gave me Stippled Blossoms and I was HOOKED!! I just love how pretty and elegant this set is. I'll bet you love it too!

Happy Stampin'!

Saturday, August 25, 2012

Raindrops on Roses and Whiskers on Kittens...

Bright copper kettles and warm woollen mittens
Brown paper packages tied up with strings
These are a few of my favourite things...

And here are a few more:


As you know from this post, I'm trying out for the CAS Design Team on SplitCoast Stampers. The most recent challenge is to use three of our favourite things (not including paper and ink) on a card. My choices were: two-step stamping, fussy cutting (bet you NEVER would have guessed!) and Stampin' Dimensionals.

I stamped the image first in Pool Party and then used my Stamp-a-ma-jig to over-stamp in Island Indigo. I did the same with the leaves, using River Rock and Always Artichoke. The Always Artichoke was stamped off because I found it a bit too dark against the River Rock.

I fussy cut both the flower and the leaves and then adhered the flower with Stampin' Dimensionals. The leaves got just the teeniest dot of Mono-Multi glue. I wanted them on a different "level" so didn't use Stampin' Dimensionals, but I didn't want them completely stuck down. So, Mono-Multi was the solution.

Last but not least, I stamped the sentiment from Teeny Tiny Wishes just below the blossom in Island Indigo.

What do you think?

STAMPS: Stippled Blossoms, Teeny Tiny Wishes
INK: Pool Party and Island Indigo
PAPERS: Whisper White Note Cards
ACCESSORIES: Stamp-a-ma-jig, Stampin' Dimensionals

Happy Stampin'!

Friday, August 24, 2012

Won't you join me?

Last weekend, I had the privilege of attending one of the amazing Stampin' UP! Regional events in Hamilton, ON.

It was a fun filled day with swaps, make and takes, demonstrations and just a general happy feeling!

One of the highlights of Regionals (and really ANY Stampin' UP! event!) is the amazing display boards. Over the next few days (weeks?) as I try my best to be compliant and let my elbow heal, I'll be sharing some of the photos from the event. Ready?

The display boards are always one of my favourite things to see, so I'm going to start with those. There were dozens of card and scrapbook samples to photograph, so these are just a few of them.


This first sample caught my eye because I'm enthralled with this set. I don't own it (yet!), but those that do can do AMAZING things with it! I just love the way the large image panel was stamped and then run through the Big Shot with the Lattice Embossing Folder.


This sample caught my eye because it looked like all the flowers had been heat embossed. Turns out, the stamper ran a window sheet through the Big Shot using the Framelit from the Apothecary Accents set. Who would have thought? I think I'll be trying this at an upcoming class, so stay tuned! :)


My last sample for today features the Scentsational Season set. What a GREAT way to use up ribbon scraps! I know we all have LOTS of those. And how easy too...just run one piece of Crumb Cake Cardstock through the Big Shot with all three framelits at once. It couldn't be easier!

Join me tomorrow for some more pictures!

Happy Stampin'!

Thursday, August 23, 2012

Because one Design Team is not enough!

Yesterday, I was hanging out on SplitCoast Stampers checking out the boards and the gallery. I decided to hunt down the CAS (that's Clean and Simple) challenge for this week and came across the Design Team call challenge!

I thought, "why not?" and got to work.

The first challenge was to create a card using the colours of our favourite sports team. Now, I could have used the Green, White and Red of my Italian boys, but the first thing that popped into my head was the New England Patriots, so I decided to go with that. I'm not a huge sports fan, but I do enjoy a good Super Bowl!


I left out the nautical blue and went with Silver, Red and White for my Christmas card. This set, Seasonal Sayings was just ONE of the gifts I won at the Hamilton Regional, so I decided to ink it up! I have to say I quite like it and I'm glad that Stampin' UP! found another Seasonal set after having retired Seasonal Sentiments (which is still available to download as a digital stamp set).

I stamped the image in Cherry Cobbler on Shimmery White Cardstock. You can't really tell in the photo, but the shimmer of the white paired with the silver looks FABULOUS!

I added some Cherry Cobbler Baker's Twine for that extra little "something".

What do you think?

STAMPS: Seasonal Sayings
INK: Cherry Cobbler
PAPERS: Shimmery White, Brushed Silver, Cherry Cobbler
ACCESSORIES: Baker's Twine

Happy Stampin'!

Wednesday, August 22, 2012

But I don't even PLAY tennis! HMPH!

Yes, I know. The logical part of me knows that tennis elbow is a repetitive strain injury. The petulant child in me, however, is just plain ticked off!

It seems my awesome record of posting every day in July has caused me some grief. *sigh* So, I'm on heavy duty anti-inflammatory meds. I SHOULD be wearing a brace and I SHOULD be doing less stamping, but...well...I'm pouting and stamping my feet instead!

Today's card is digital because I'm SUPPOSED to be cutting back on stamping for a bit. Let me tell you, I'm none too pleased about it and will probably just keep stamping anyway. :P


I knew I wanted to do something "fall", so I started off with a base of Pumpkin Pie polka dots. In order to mute it a bit, I added a layer of Whisper White and reduced the opacity to 50% making it look like vellum. That's one of my FAVOURITE My Digital Studio tricks.

Next I added the Old Olive diagonal stripe and the image panel. When I stamped the pumpkins, they were black so I changed up the colour by using the colouring tool and it was SO fun! And you know what? You CAN go outside the lines in MDS. While I was colouring, I was trying to be careful to not get the Pumpkin Pie outside the outline of the pumpkin. I discovered that it didn't matter. WOOT! So I coloured the pumpkins in Pumpkin Pie and their stems in Old Olive. It took less than a minute!

The finishing touch was the brads in the bottom right hand corner.

I stayed true to the sketch on this one, so you'll actually be able to recognize it for a change - LOL!


What do you think?

ACCESSORIES: It's all digital! MDS baby!

Happy MDSin'!

Tuesday, August 21, 2012

Happy Anniversary!

It's my wedding anniversary at the end of this month and I couldn't be happier! :)

While discussing something TOTALLY unrelated, my downline Teresa and I learned that BOTH our wedding anniversaries are this month.

She asked my for my snail mail address, so I wasn't TOTALLY surprised when this:


arrived in the mail!

Isn't it DARLING??

Teresa used the Elegant Lines embossing folder and embellished with LOTS of pearls and the Beautiful Wings Embosslit. I just love everything about it! SO much attention to detail!

Thank you for making my heart happy Teresa! :)

Monday, August 20, 2012

Bring on the Cake for Dynamic Duos

This week, over at Dynamic Duos, the challenge is a "Black Tie" colour challenge. This means, black with another colour. In this case, it's River Rock. And of course, what's a black tie event without dessert? Black Tie colour challenges feature a dessert option - this week, brads!


Here's my card:


Have you tried out the new Delicate Doilies Sizzlit Die yet? They're just adorable with SO much detail! They can be a bit troublesome, what with all those small pieces, but the end result is DEFINITELY worth it!

Here's a close up:


Isn't that GORGEOUS?? And don't you just love that little cupcake? It's from the exclusive hostess set "Carry On", which you can earn by hosting your own workshop. I stamped it in River Rock on Very Vanilla and cut it out before adhering it the card using a Stampin' Dimensional. I then adhered the sentiment/image panel to the card front using Stampin' Dimensionals as well.

Here's a close up of the two black brads I used:


This is just one of the cards we'll be making at my Birthday Card class on September 8th. And don't worry...I'll do ALL the fussy cutting for you!

What do you think?

STAMPS: Bring on the Cake, Carry On
INK: Staz-On, River Rock
PAPERS: Very Vanilla, River Rock and Basic Black Cardstock; River Rock DSP
ACCESSORIES: Big Shot, Sizzlit, Brads, Punch, Stampin' Dimensionals

Happy Stampin'!

Wednesday, August 15, 2012

It's Paper Craft Crew Challenge Day!

Ready to get your stamp on? Here's our sketch:


You can check out what the rest of the crew has created by clicking here. It seems the rest of the crew wasn't quite so freaked out with those extra panels!

As you'll soon see, I took some SERIOUS liberties with this one! I just couldn't make parts of it work the way I wanted them to, so I took it REALLY basic!

Here's my card:


Can you at least PRETEND to see the resemblance? LOL!!! Well, that centre square is there...the ribbon that I imagined near the bottom was bumped up and a sentiment replaced it. All in all, I like the simple elegance of the card.

My little ladies, from the set Little Friends, were stamped in Basic Grey on Whisper White. I then used my markers to colour them in. Thankfully, when Stampin' UP! did the whole colour revamp in 2010 they left us with Blush Blossom which is still one of the most perfect colours for colouring in peachy complexions. :)

The sentiment at the bottom of the card comes from the set "Cherish Friendship" and was stamped in Basic Grey.

What do you think?

STAMPS: Little Friends, Cherish Friendship
INK: Basic Grey
PAPERS: Whisper White and Basic Grey Cardstock; Pretty in Pink DSP
ACCESSORIES: Ribbon, Markers, Stampin' Dimensionals

Happy Stampin'!

Thursday, August 9, 2012

It's time to PARTY!!!!

Are you ready for a party??

A couple weeks ago, I hosted a workshop for Keely and one of her attendees wanted to make invitations for her son's birthday party.

She chose Patterned Party as her set and Summer Smooches for her Designer Series Paper. I came up with a simple design for her (it's her very FIRST time stamping solo) and she was thrilled. I showed her this card too:


When she's ready to step it up, she'll have some more inspiration!

I stamped the banners in Island Indigo on Whisper White and then matted that onto one of the patterns in Summer Smooches before adding it to the Island Indigo card base.

The balloons were coloured using markers directly on the rubber. They were stamped on Whisper White and matted on Island Indigo. I then wrapped a short piece of Daffodil Delight stitched grosgrain around the image and adhered it to the front of the card using Stampin' Dimensionals.

From the strip of numbers in the stamp set, I used markers to colour JUST the number I wanted and stamped it onto Whisper White. It was punched out using the small oval and adhered over the ribbon using Stampin' Dimensionals. I added Dazzling Details to the flame.

I finished the inside too, of course:


What do you think?

STAMPS: Patterned Party
INK: Island Indigo, Real Red
PAPERS: Whisper White and Island Indigo Cardstock; Summer Smooches DSP
ACCESSORIES: Punch, Ribbon, Markers, Stampin' Dimensionals, Dazzling Details

Happy Stampin'!

Wednesday, August 8, 2012

It's Paper Crafts Crew Day! Are you ready to play??

Since you've seen some Christmas in the past few days, I decided to change things up a bit today and give you some bright and cheery!


I started off with an Island Indigo base as the colours for this month's Creative Crew challenge over on SplitCoast are taken from the Summer Smooches Paper Pack and I wanted to add another card to my gallery for that. :)

Next, I had to figure out how to make that swoop at the bottom. It was easiest to just hand draw it and cut it out, so I went with that. I then added the layer of Tangerine Tango Designer Series Paper to the Tangerine Tango Cardstock Layer.

And then...because I was suffering from "fussy cutting" withdrawal *grin* I cut out the balloon, the basket AND the streamer!

I finished off with the sentiment (from Teeny Tiny Wishes) stamped in Island Indigo on Whisper White and matted on Tangerine Tango.

And here's the sketch on which my card was based:

(click on the image to go to the Paper Crafts Crew website)

What do you think?

STAMPS: Up, Up and Away; Teeny Tiny Wishes
INK: Island Indigo, Tangerine Tango
PAPERS: Whisper White, Island Indigo and Tangerine Tango Cardstock; Tangerine Tango DSP
ACCESSOIRES: Punches, Stampin' Dimensionals

Happy Stampin'!

Tuesday, August 7, 2012

Have you tried our new ink pads yet?

When the new 2012-2013 Stampin' UP! catalogue launched on June 1st, new ink pads were introduced. Check it out:


AWESOME!!!!

Monday, August 6, 2012

Catalogue CASE goes to Hamilton!

I'm SO stinkin' EXCITED!!! Stampin' UP! is doing a Regional event in Hamilton...and it's just 12 days away!

Every year, Stampin' UP! puts on a BIG convention in Salt Lake City. Next year, it's Stampin' UP!'s 25th anniversary and I'll be going - it'll be my first time!

Throughout the year, Stampin' UP! puts on a "travelling show" and hosts regional events across Canada and the US.

I went to one a couple of years ago and am SO excited that there's another one nearby. I'm all registered and ready to go! I'm working on my swaps for the event. So far, I have one organized swap done (where a group of ladies decide to swap amongst themselves) and I've done one card for some general swapping. Swapping enables demonstrators to get new ideas and samples for our customers to see at classes. I still have one more organized swap to complete and then if I have time, I'll do some more cards for general swapping. I can't wait!!!

Here's just one of my general swap cards:


I found the idea in the catalogue and decided to CASE it (CASE stands for Copy And Share Everything). I didn't have the stamp set used in the catalogues sample, so I made it my own by using the Occasions Alphabet set. Do you know that there are HUNDREDS of ideas in the catalogue? If you don't have one, please email me and I'll get one out to you! (Canadian residents only, please)

Here's a close up of the stamped image:


I added Stampin' Dimensionals to pop it up a little bit...and don't you just LOVE those pearls? SO CUTE!!!

What do you think?

STAMPS: Occasions Alphabet, Bells and Boughs (used for background)
INK: Cherry Cobbler
PAPERS: Very Vanilla, Cherry Cobbler, Early Espresso and Lucky Limeade Cardstock; Cherry Cobbler DSP
ACCESSORIES: Big Shot, Framelits, Punches, Basic Pearls, Stampin' Dimensionals

Happy Stampin'!!!

P.S. It's August 6th! And for now...I'm all caught up - YAY!

Sunday, August 5, 2012

Another Christmas Card

Today I've got another Christmas card from my upcoming Stamp Camps for you! This one features the same colours as yesterday, but I switched out the stamp set:


This one uses Jolly Bingo Bits and features another pattern from the Be of Good Cheer paper pack.

I stamped the images on Very Vanilla Cardstock and punched them out using my 1 1/4" square punch. They were then matted on a pieces of Cherry Cobbler punched with the 1 3/8" square punch.

What do you think?

STAMPS: Jolly Bingo Bits
INK: Cherry Cobbler, Early Espresso, Gumball Green
PAPERS: Very Vanilla and Cherry Cobbler Cardstock; Be of Good Cheer DSP
ACCESSORIES: Punches, Stampin' Dimensionals

Happy Stampin'!

P.S. Yes, still catching up! :)

Saturday, August 4, 2012

Catching up on Christmas

Yes, I KNOW it's August the 6th, but I've got Christmas card classes right around the corner to make sure that all my customers are ready for the holiday!

I'm doing 4 Christmas stamp camps (once a month from September to December) and my local customers have the opportunity to sign up for all four classes, get a discount when they do and take advantage of a shopping spree valued at $25 in January! Out of town customers can choose to participate by having all the supplies (minus stamps and ink) sent to them with instructions (instructions are sent via email). The price is the same whether you participate in person or via mail. If you sign up and pay for all four classes before August 25th, you'll pay the special price of $150. This fee is NON REFUNDABLE.

Here's just ONE of the cards we'll be making:


The way Christmas Stamp Camps work: We'll create six different cards at each class, creating three of each for a total of 18. Sign up for all four classes and you'll have 72 cards READY TO GO!

The card above has a matching stamp set/framelit combo in the Holiday Catalogue. MANY of the sets in the Holiday Catalogue have matching framelit sets. You'll have your cards created in NO TIME!

What do you think?

STAMPS: Scentsational Season
INK: Early Espresso, Gumball Green, Cherry Cobbler
PAPERS: Very Vanilla, Gumball Green and Cherry Cobbler Cardstock; Be of Good Cheer DSP
ACCESSORIES: Framelits, Big Shot, Stampin' Dimensionals

Happy Stampin'!

P.S. If you're paying attention, you've realized that despite the fact that this post is appearing on August 6th, it's dated August 4th. I'm trying to catch up on my daily posting and my "A" type personality is at work - LOL!

Friday, August 3, 2012

Happy Halloween!


WHAT? Yep! You read that right! Happy Halloween! WHY am I wishing you a Happy Halloween on August 2nd? Because of this:


SERIOUSLY? How cute is that?? Join my team in August and you can get one of these adorable little projects to complete! You'll get EVERYTHING you need (except ink), INCLUDING the tray!!! Would YOU like to get and make one of these?

Easy peasy! Join my team and it's yours! You can get started by clicking here. All the information you need to get started is there and if you have ANY questions, you can always email me or leave me a comment on this post. Be SURE to include your email address in the comment so I can get back to you.

Already ON my team? FABULOUS!!! Anyone who recruits this month will be invited with their new downline to a SPECIAL Canadian Blossoms team meeting (date to be announced) where we'll make them all together!

I can't WAIT!!!

Happy Stampin'!